Black screen on R2 start up
The first step is to make sure the HDMI is properly connected to the Raspberry Pi and to the LCD Screen. Your HDMI cable may look different than pictured, but the location will always be the same. First turn off your printer. Then locate and unplug and reinsert the HDMI cable. Now turn on your printer to see if that has fixed the problem.
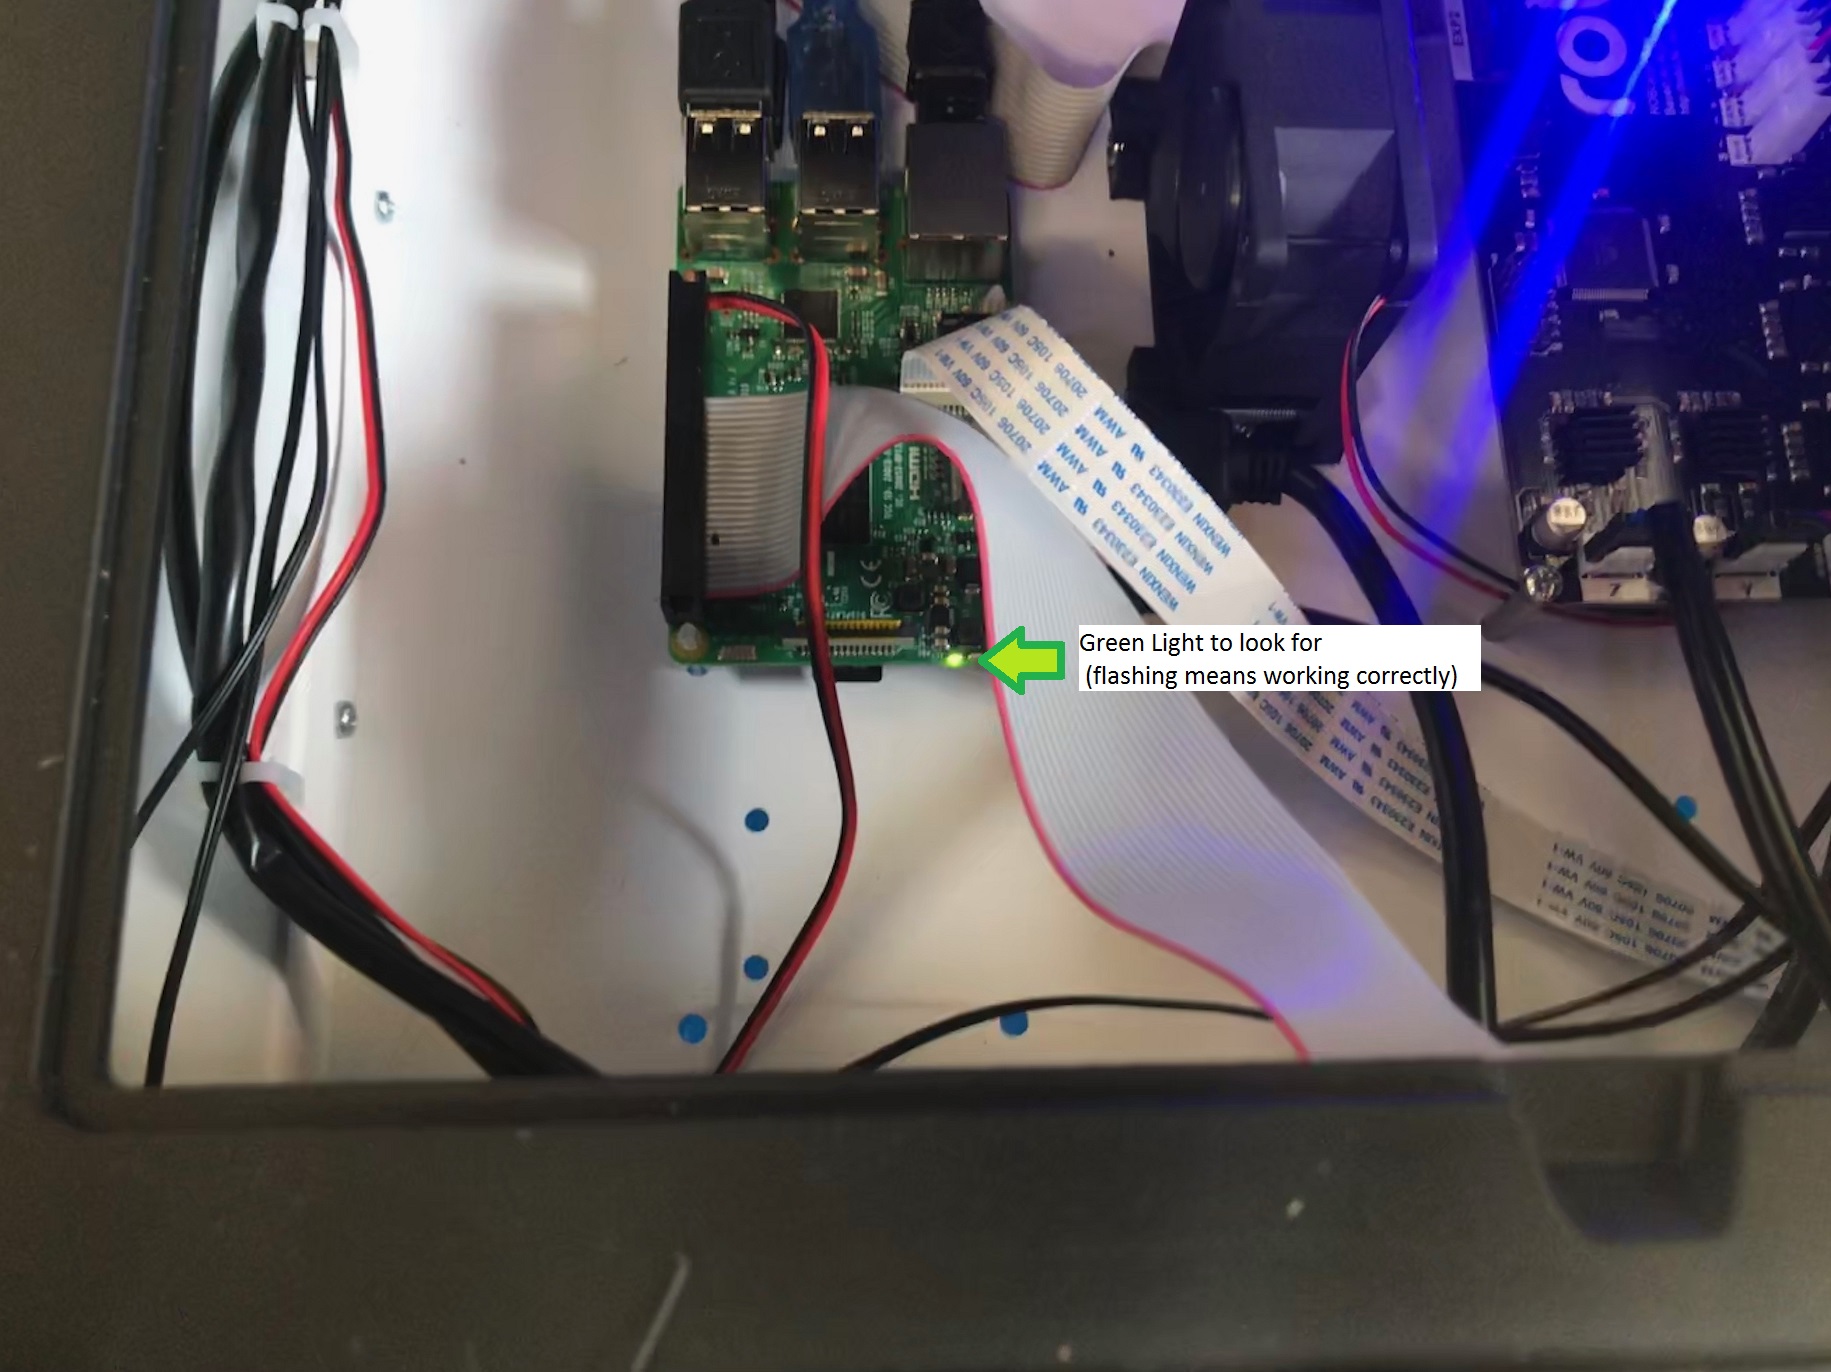
If you still have a black screen on start up, check the LEDs on your printer's Raspberry Pi. If the green LED is steady (not flashing on/off), then proceed with the following steps.

1. Download the file attached to this article (this will go onto your SD card)
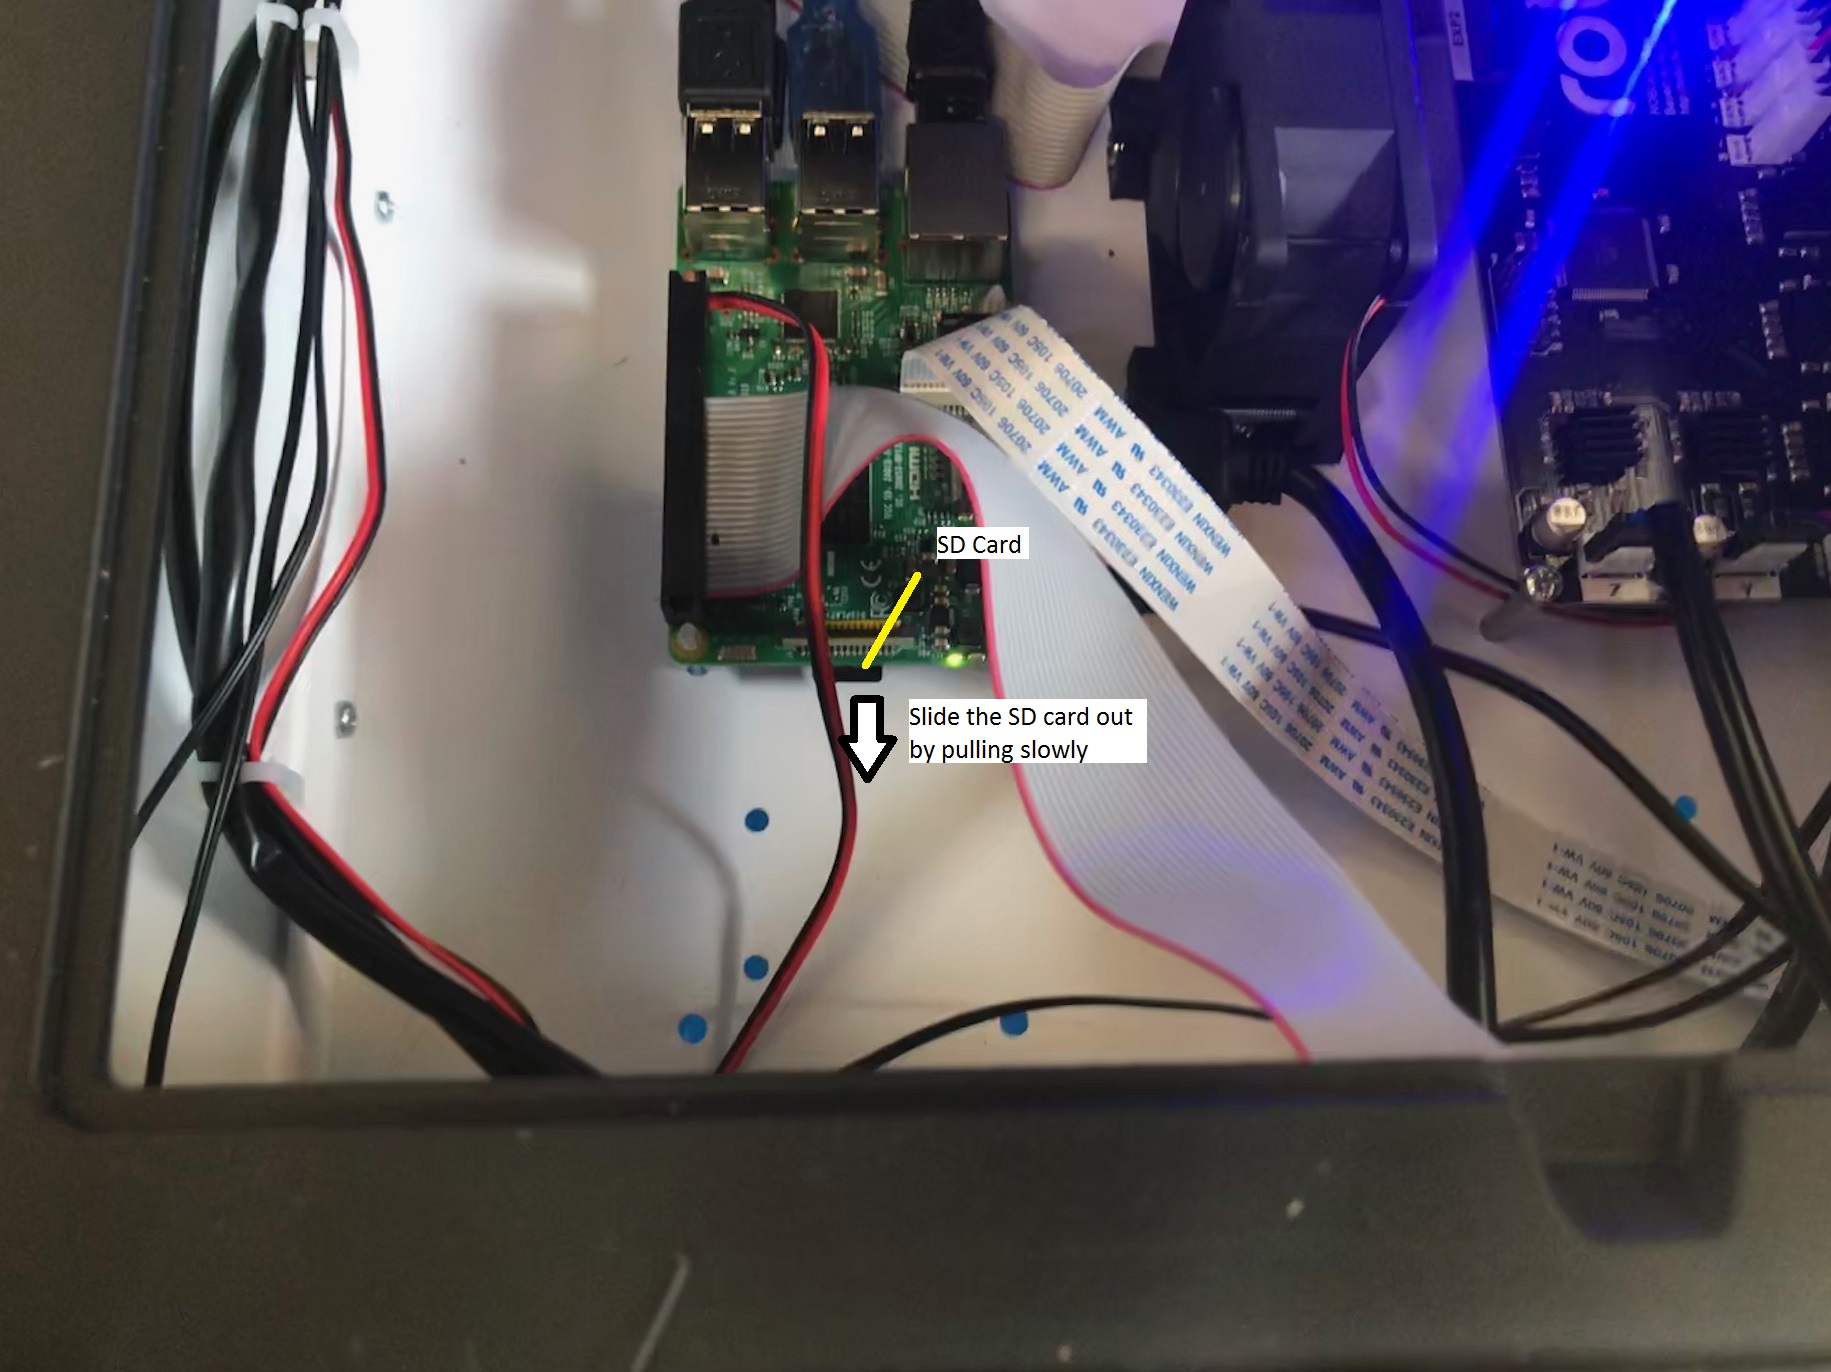
2. Take out the SD card from the Raspberry Pi and plug it into a computer with a micro SD card adapter.

3. This should bring up a drive called boot. Click into the drive and delete the following files:
- bootcode.bin
- fixup.dat
- start.elf,
- start_db.elf
- start_cd.elf
- start_x.elf
4. Open the file you downloaded in step 1. This zip file should contain replacements for these six files. Go ahead and extract the files onto your computer, then copy these 6 files and paste them into your boot drive (replacing the files you deleted in step 3).
IMPORTANT: Make sure to properly eject the SD card and wait for confirmation before disconnecting it from the system.
5. Load the SD card into your printer and turn it on. If your Pi boots up correctly, then you're done. If not, please contact customer support for a replacement SD card.
Comments
1 comment
The link to download replacement software does not work.
Please sign in to leave a comment.