'Connection Interrupted' error
This connection interrupted error is a result of the main electronics board not being detected. There are a few ways this can happen - more discussed below.
1. First step in resolving this error is trying to reset the connection to the printer. A button is displayed within the error message labeled ‘Reset’. Press that to initiate an electronics reset. If this doesn’t work, look to the next step to try and resolve the problem.
2. If you have the V1 print bed check the health of your pogo pins
3. Check your wiring on the top of your extruder. Make sure the two clips to the sides of the ribbon cable on the top of extruder are locked into place. Also, make sure the other white plugs are seated all the way into their sockets.

4. Check the wiring on your hotend. Sometimes these can come loose and send an error to the electronics. There will be two sets of wires. One for the temperature reading, and one for the heating power. Make sure these plugs are seated all the way up into their sockets. The wires should be seated all the way to the left. The thinner wires are the ones that go toward the front of the extruder, and the thicker, all red wires should be plugged into the plug towards the back of the extruder.
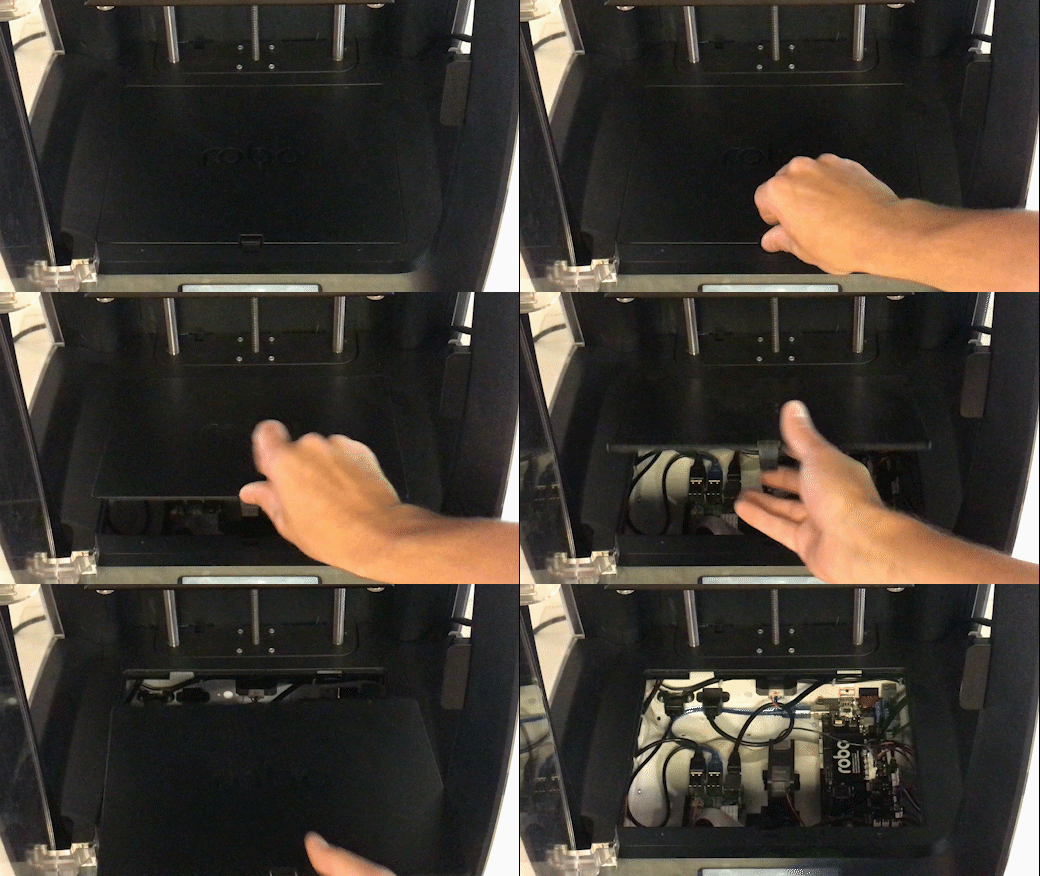
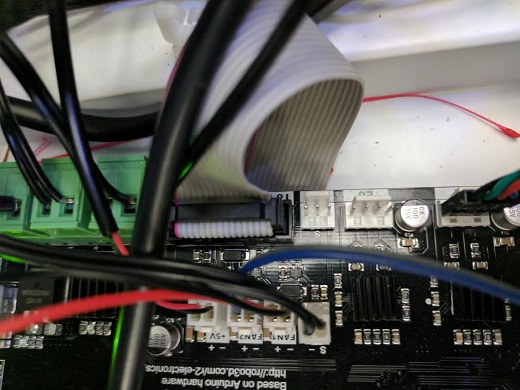
5. Check the wiring on your main electronics board. Every so often, the ribbon cable coming from the main electronics board can come loose. You will need to first take the inner panel out (located inside the printer below the bed) to get to the inside of the printer. Once that is out, you will see two electronics boards. We want to look at the one on the left, which is black. On the back right of the black electronics board, there is a ribbon cable plugged in. Make sure this ribbon cable is seated all the way down into its plug to ensure there is a proper connection.


Comments
4 comments
My Problem is that every time I turn on the Robo R2 I have to reset the connection manually.
Considering that not a single person has ever found this guide helpful, is there a way that something helpful can be added. The last gif and picture of the board is very vague.. Anyone can figure out how to open a cover.. what are we supposed to be looking at on the motherboard in the second pic?? Thanks
In my case the fix was to reinstall the operating system. I provided Robo customer service with the ID name of the printer and they sent me a download link with instruction on how to do it.,
Thanks! I'll mention that! I just bought a much cheaper Creality CR10S so I'll have something to use when this brick of a Robo is down and though not nearly as fancy, it's working perfect out of the box!
Please sign in to leave a comment.