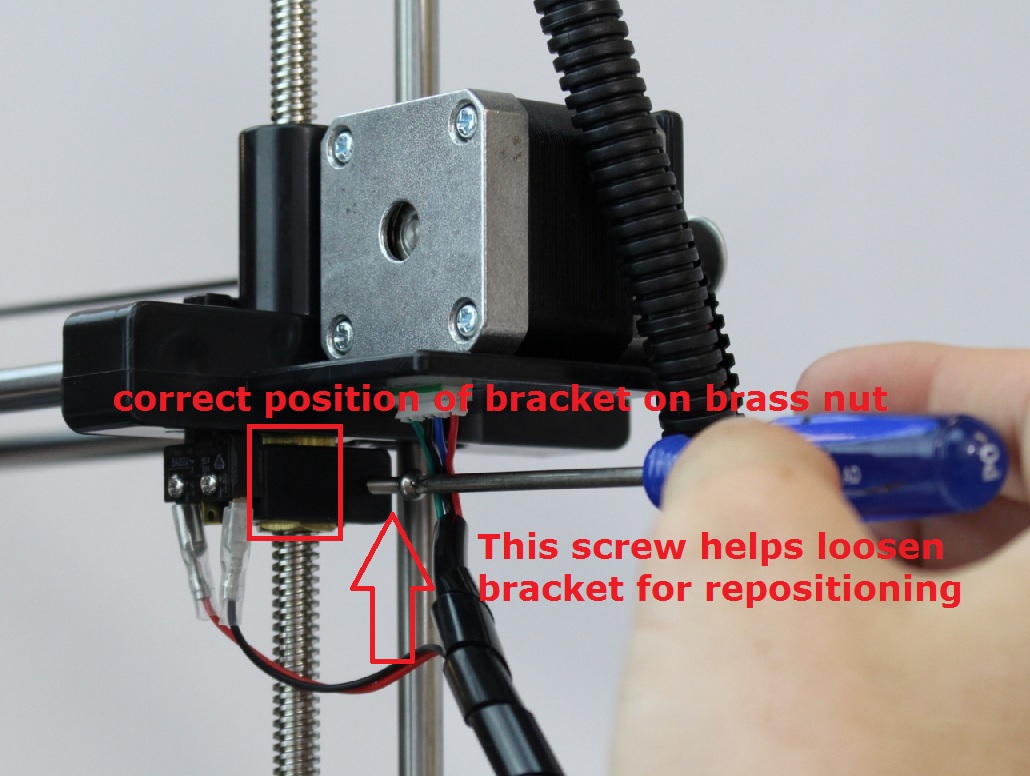
The problem is that one or both of the Z axis endstop switches is either not engaged or it's disengaging too soon.
For the R1+ here are some videos for making sure you brackets and endstops are in position.
Left side z endstop bracket
Right side z endstop bracket
Here is also a photo that shows how your bracket should be positioned.
On the R1 you can watch this video here to make sure everything is in order with homing the extruder.
https://vimeo.com/102960756
After that you will need to make sure the X axis is still parallel to the bed. To do this you just need to lower the Z Axis a couple of millimeters from the bed and slide the extruder to one side. Now pay attention to the gap between the nozzle and the bed while sliding the extruder to the other side. You will want to adjust one side to make this gap consistent across the bed. You can do this by turning the threaded rods with your hand to raise or lower each side.
It's also possible you'll need to adjust your Z offset if it's not printing at the perfect height on the first layer.
If you have the R1 Plus, use the macro buttons to adjust Z offset. You'll have to type M565 in the Terminal to see what it's currently set to and adjust from there.
For the old R1 Firmware
To adjust the height at which the extruder starts the first layer, please go to settings, under Printer, Print Area, you will see Z offset. The default setting is 0mm. Please set it to 1mm for R1 or leave it at 0mm for R1 Plus, then save. You can lower or raise this number by 0.1mm. If you need to adjust, please only adjust by 0.1mm at a time. Once you get this number set for your printer you shouldn't have to change it again.
If you are using the Cura slicing engine then the procedure is a bit different. You will go to Settings, Printer, custom g code, start g code. There you will see a line in the code that says M565 Z-1. Here you should change the 1 by 0.1 to make it 0.9 (closer to the bed) or 1.1 (further away from the bed).
Comments
0 comments
Please sign in to leave a comment.