Screens Goes White or Doesn’t Work
If the screen is not working there is a few steps that need to be taken to solve the issue.
- Loose Wiring
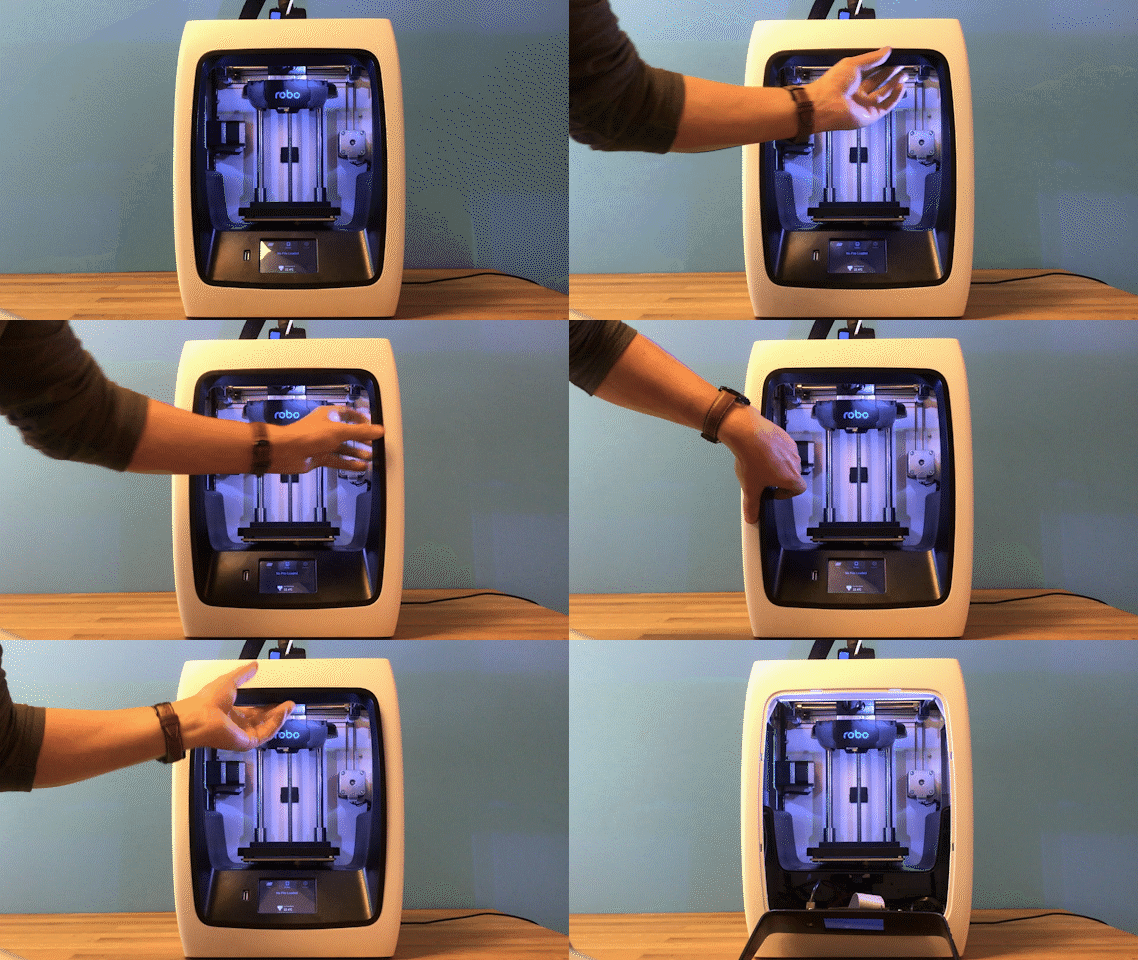
- First, remove the black bezel (which is the black plastic holding the screen) by gently pulling inward from the inside edge of the plastic. From here you will be able to see the electronics of the printer.
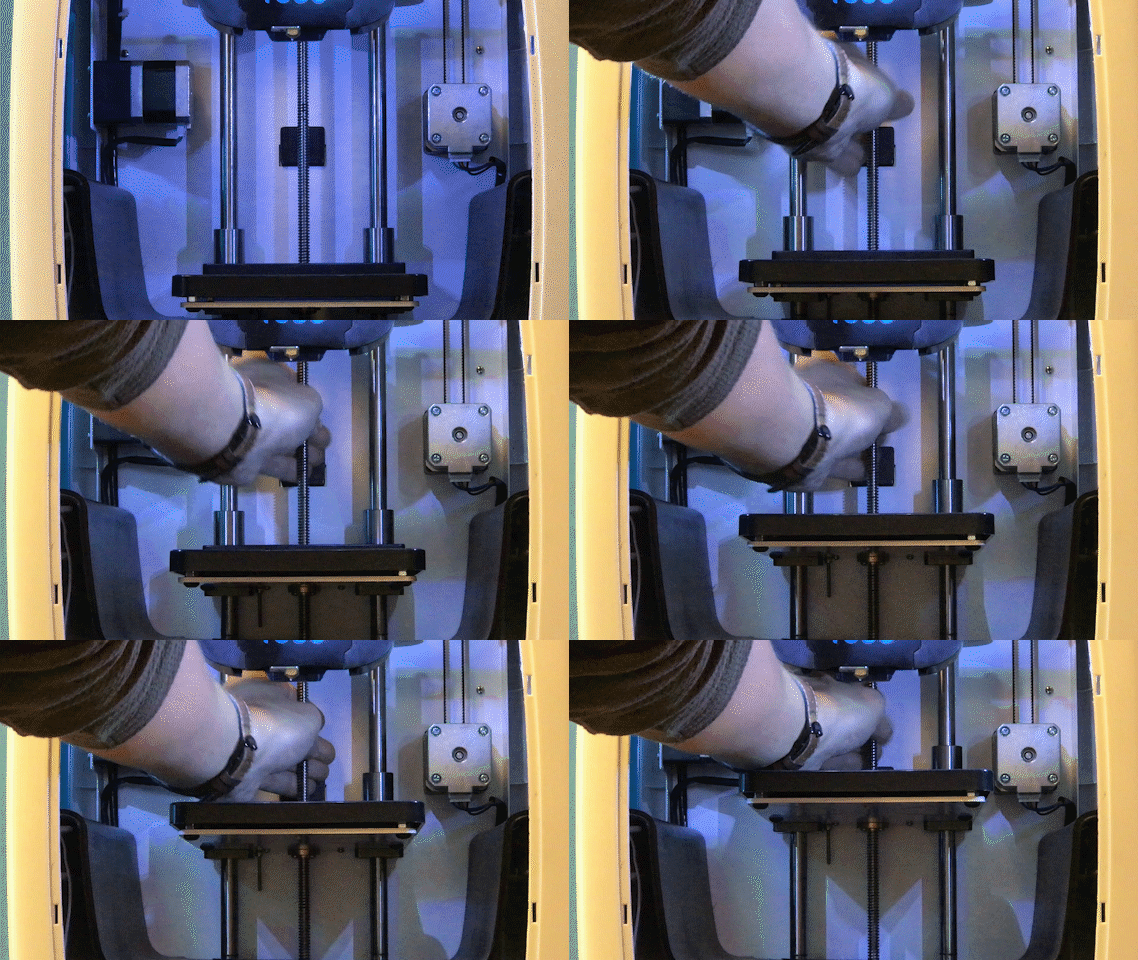
- Next, raise your bed by manually turning the long threaded z screw until the bed is mostly all the way up. Now remove the internal lid under the bed that says Robo on it for better access to the electronics.
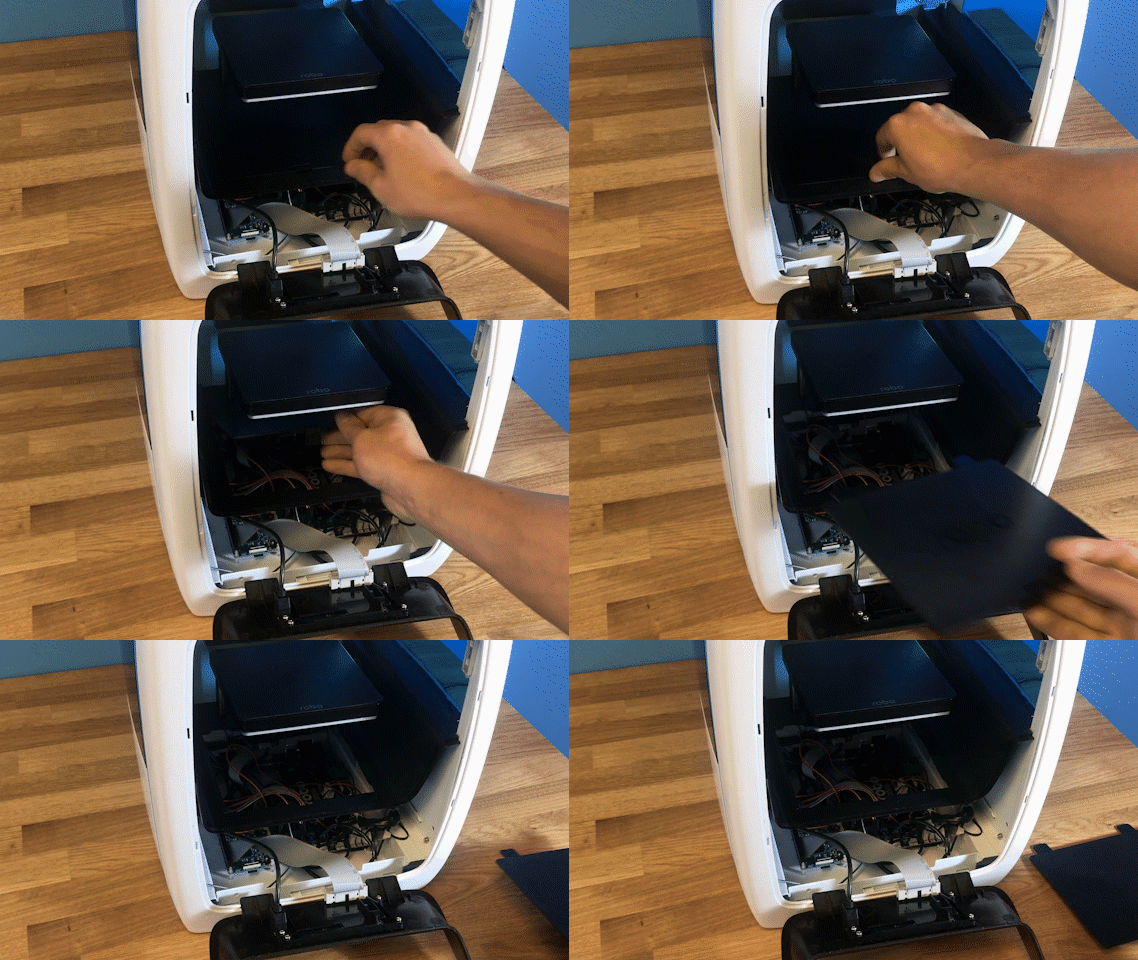
- Here, you will see a ribbon cable attached that attaches the screen to a green electronics board.
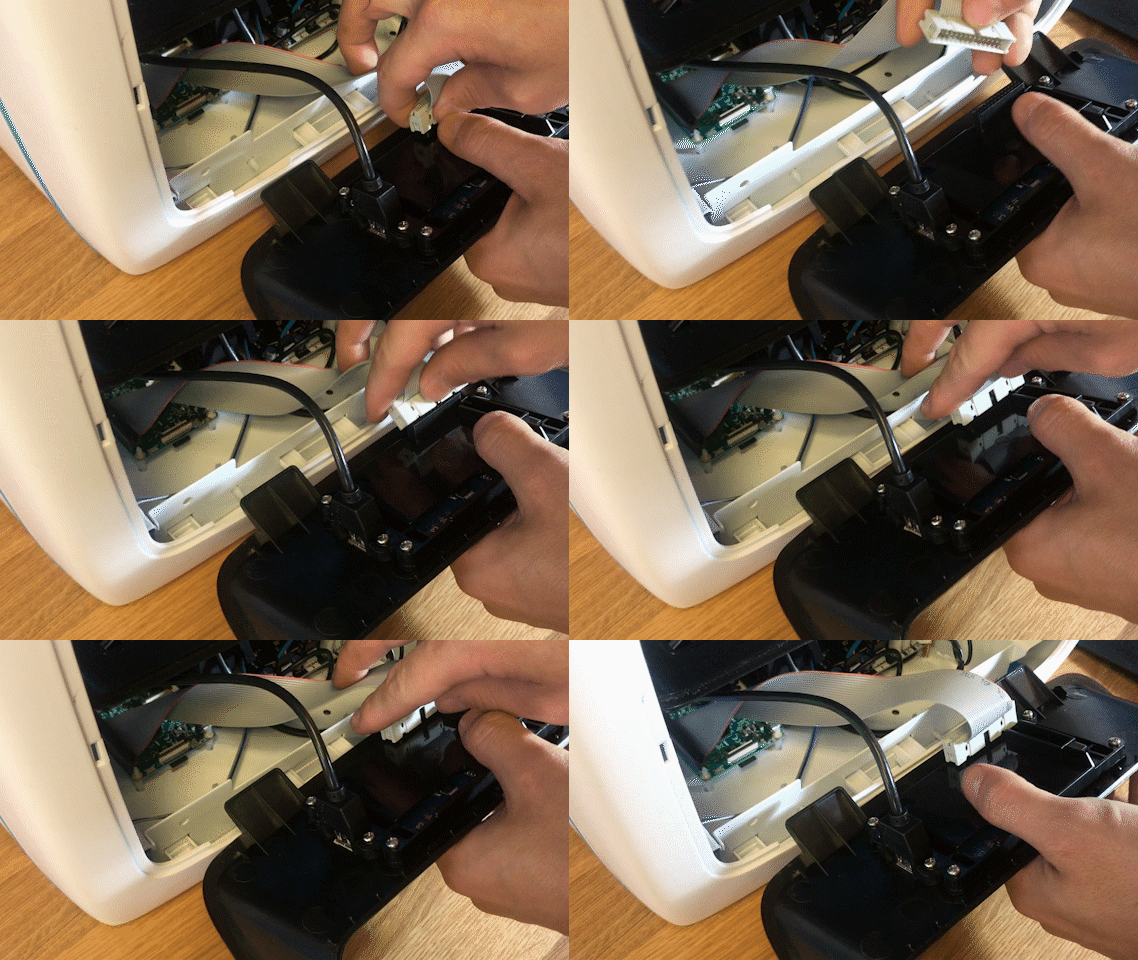
- Note the original orientation of that the cable is connected to the screen. It is important to plug it in exactly as it came. There are two types of screens. The way the ribbon cable plugs in differs slightly between the two. Refer to image below:
- On the screen side, detach the screen cable and re-attach. Do the same thing for the green electronics board side. (Reattach the cable according to which screen type you have. Refer to above photos)
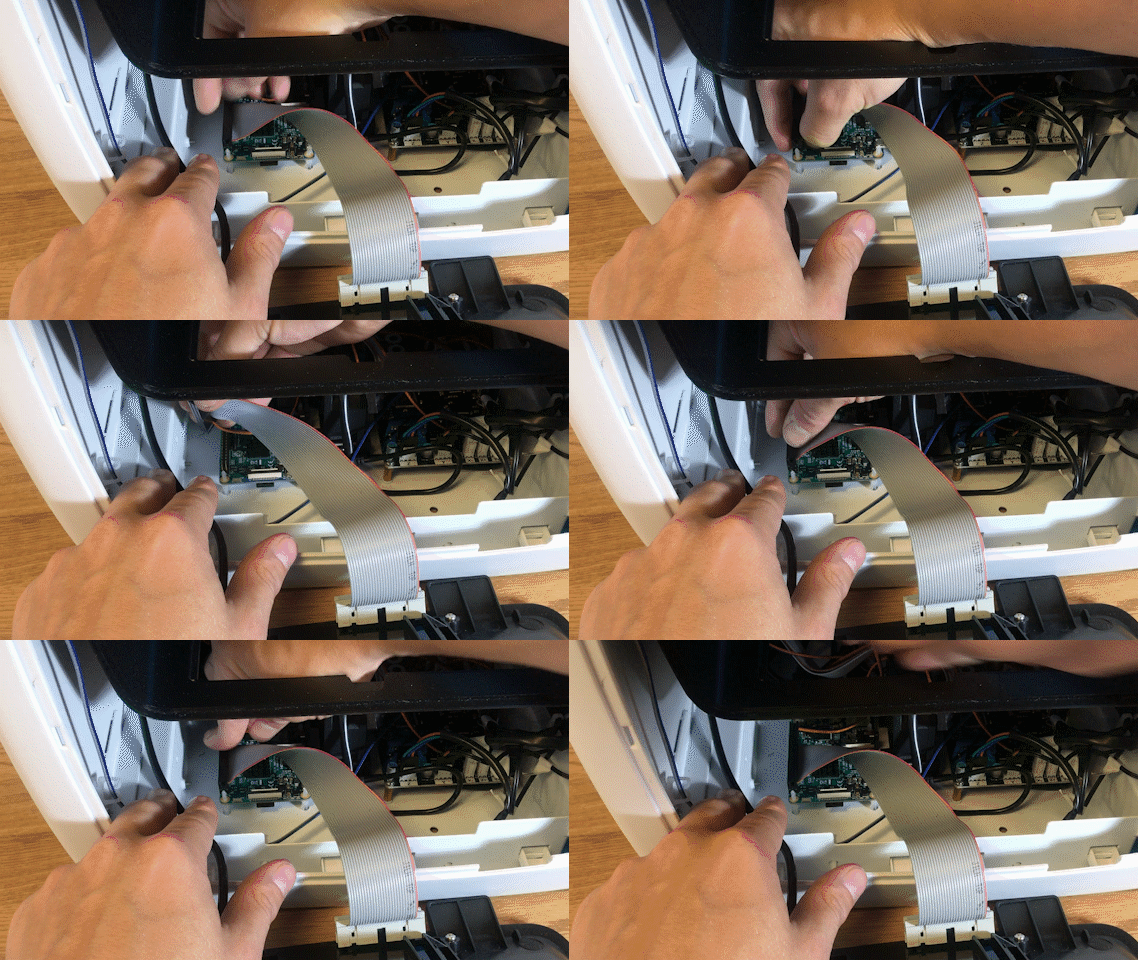
- Next, find the micro usb cord that is plugged into the bottom right corner of the green electronics board. Unplug this and plug it back in.
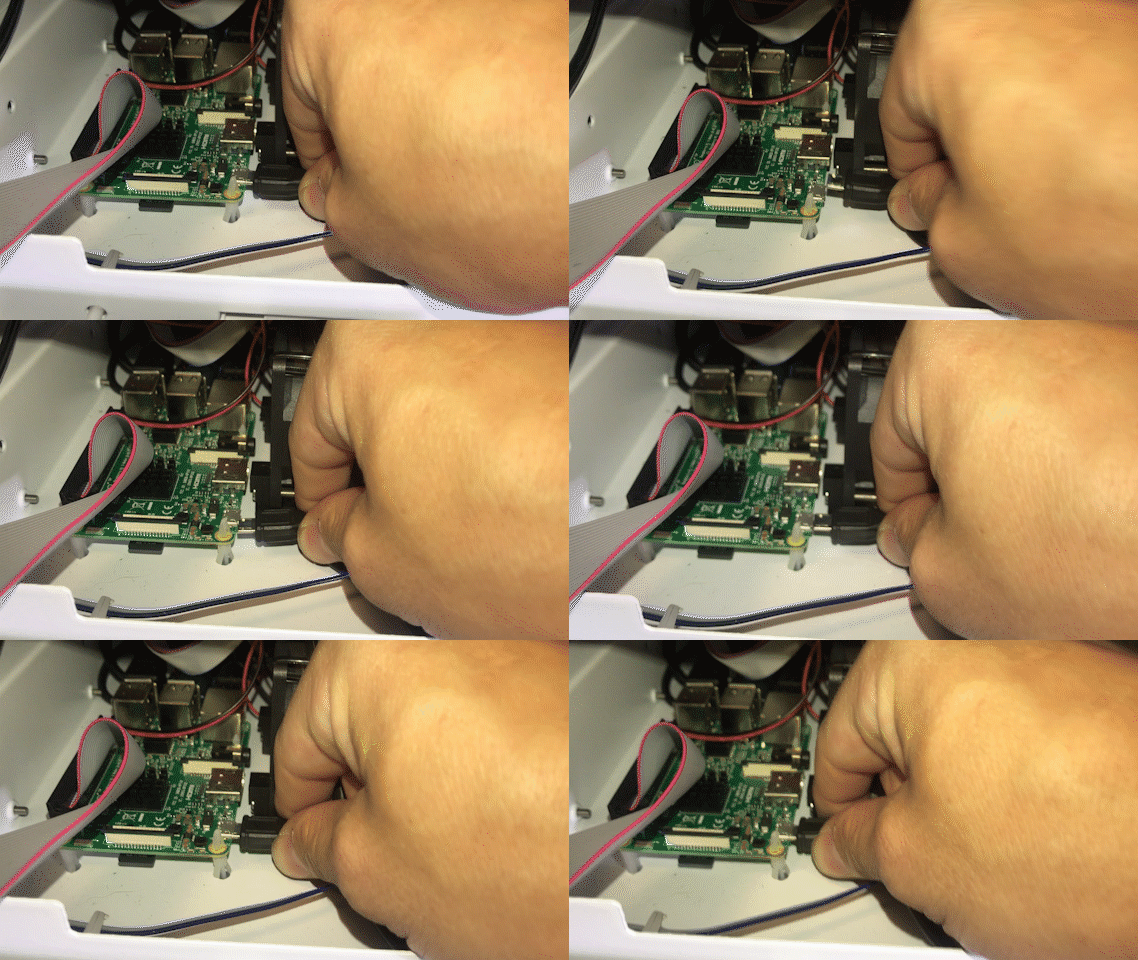
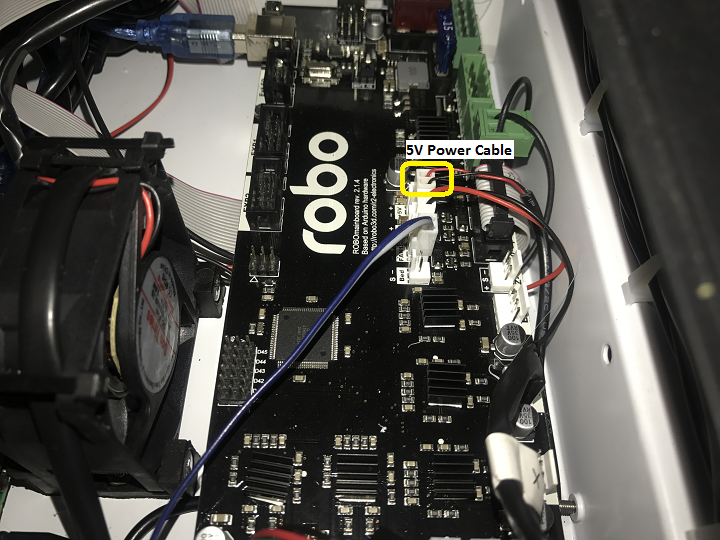
- Finally, follow the micro usb cord you just unplugged and follow it to the other end on the black board. It should be plugged in on the black electronics board in a terminal labeled 5V right next to Fan2 plug in. Unplug and re-plug this back in.
- Power on your machine and check for a red light on the Raspberry Pi
- If the light is not solid red, the Raspberry Pi is not receiving enough power. Contact customer support to get a replacement power cable
- If your screen is still broken
- Contact customer support at www.robo3d.com/support
Comments
3 comments
Hi! It dosen't work and now my screen is white. Any ideas?
Screen is still white. Any ideas on how to fix?
Did you get your screen to work? We have the same issue.
Please sign in to leave a comment.