Replacing the R1+ print bed V1 with V2
Follow these steps to install a replacement print bed on your R1+ printer.
First, check to see if what version of the bed you have.
If the bed cable has an external connector as pictured below, you have V2. See this article for instructions for replacing the V2 print bed.
If your bed cable does not have an exposed black connector as pictured below, you have V1. You may continue with the instructions below.
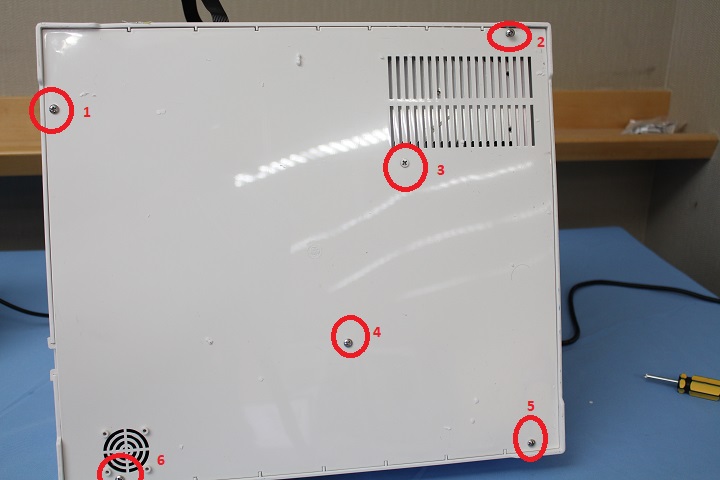
1. First, let's unplug the print bed wires from the electronics board. To do this, turn the printer on its side and remove the 4-6 screws holding the bottom panel in place. Then remove the bottom panel to reveal the electronics.
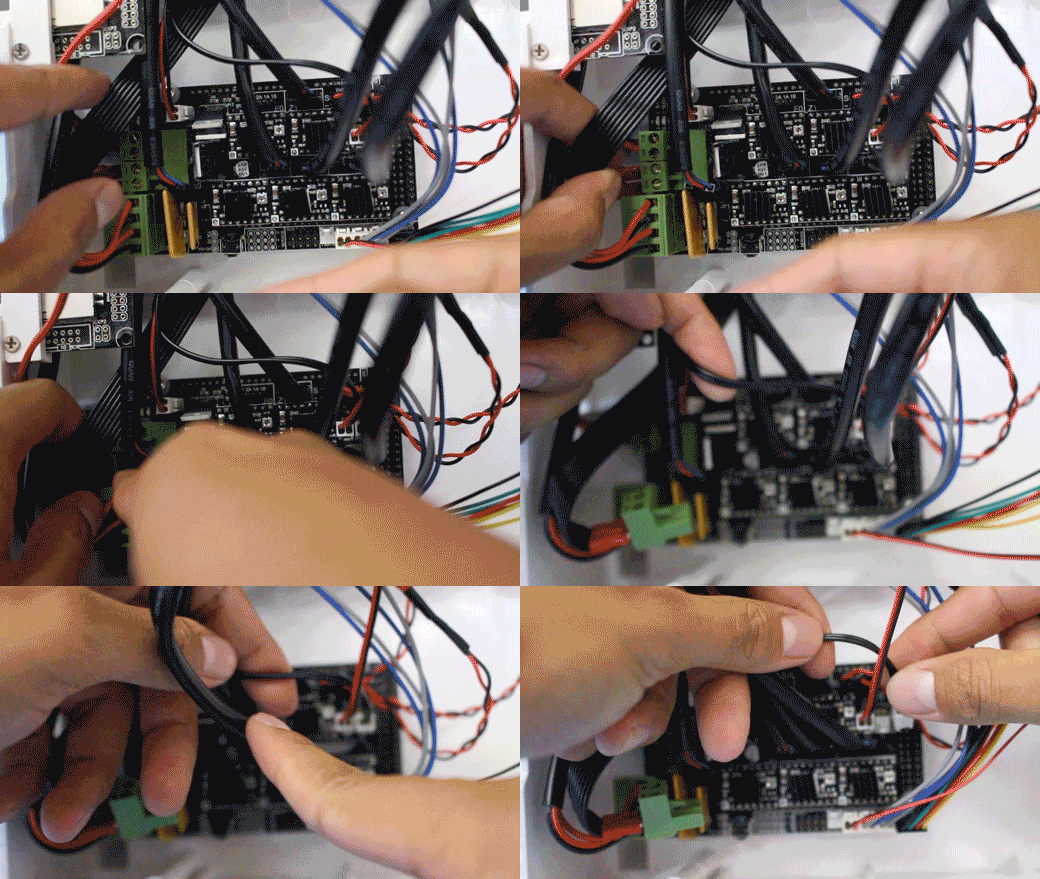
2. Locate the black ribbon cable that connects the print bed to the RAMPS electronics board (this is the cable that goes from the electronics board, out through the slots in the rear of the printer). Find where the wires split.
3. Follow the larger portion of the split to the green heater power connector on the RAMPS electronics board and push the connector out to the left to unplug it. Then, follow the smaller portion of the split cable to the thermistor connector and unplug it.
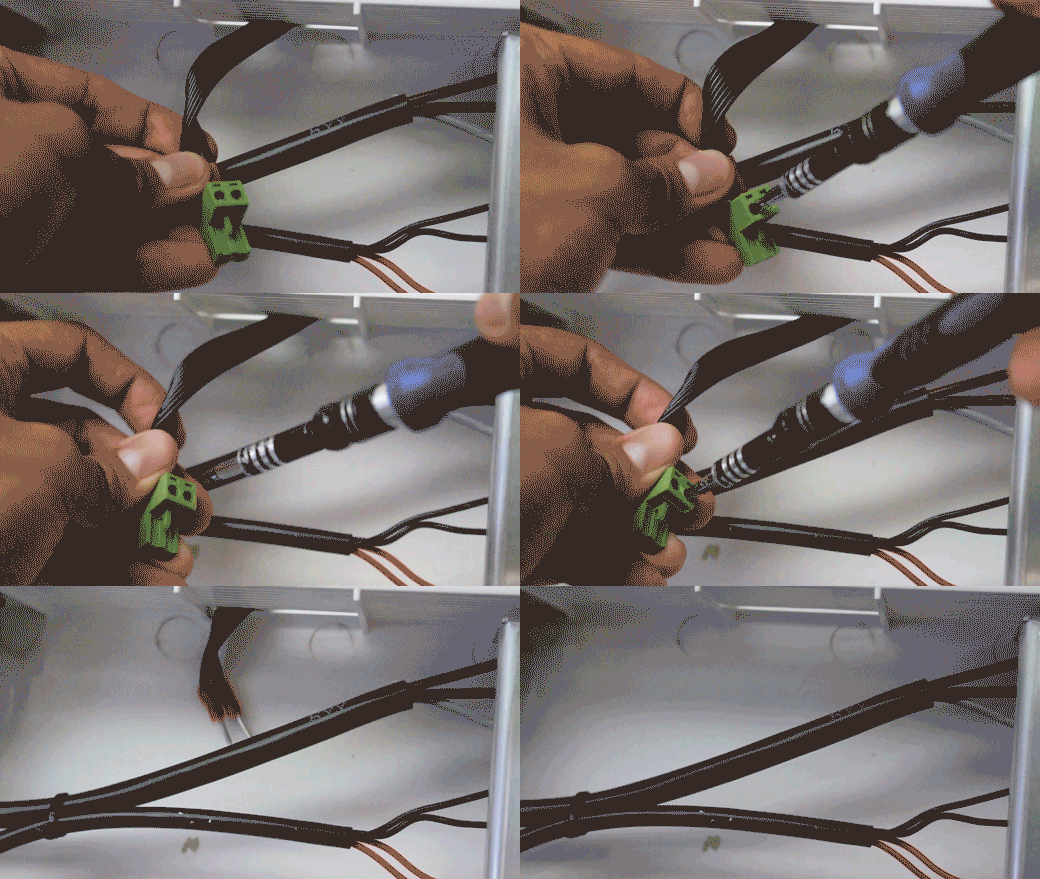
4. Find the tape that holds the ribbon cable down to the bottom of the unit and peel it off.
5. To allow you to pull the cable out of the rear panel slot, you need to unscrew the green terminal plug from the heater cable with a flathead screwdriver
NOTE: Keep this green connector to reattach it to the new print bed wires.
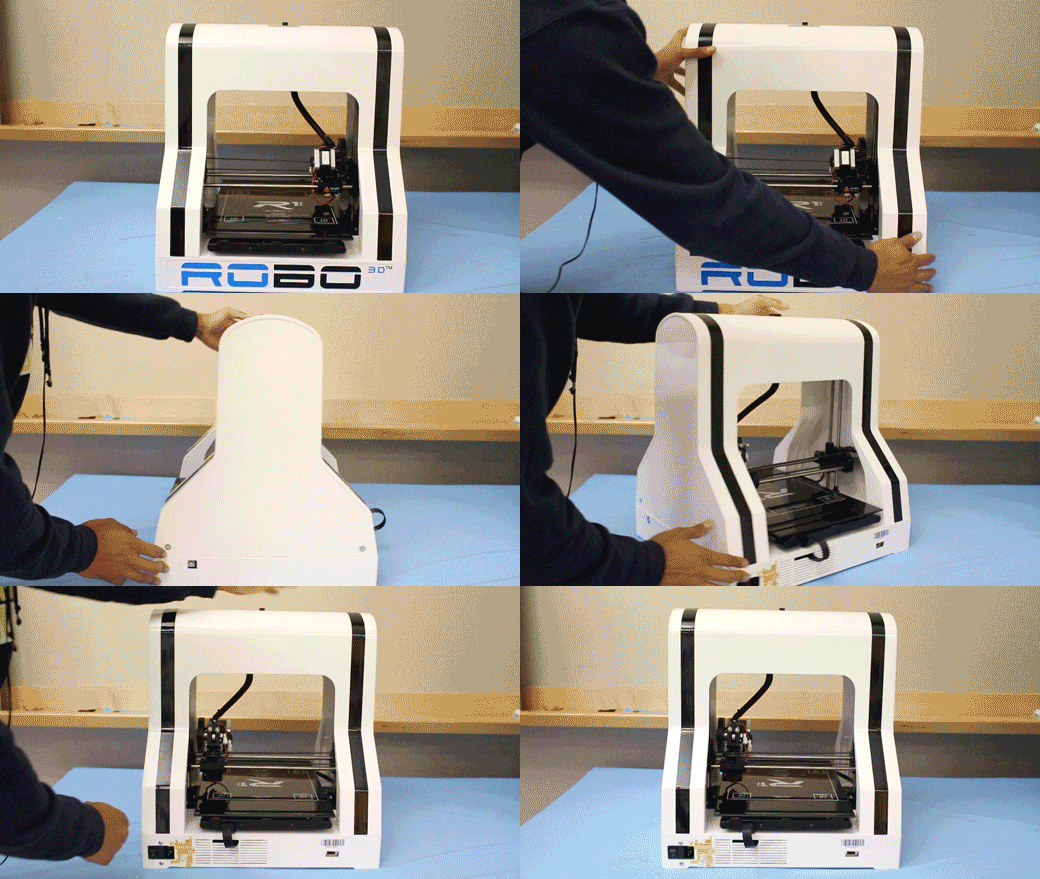
6. Now, turn the printer upright and spin it around so that the backside of the printer is facing you.
7. Check for an 'F'-shaped clip on the left side of your Y Carriage, beneath the print bed. If present unscrew it and reach beneath the bed to slide it out.
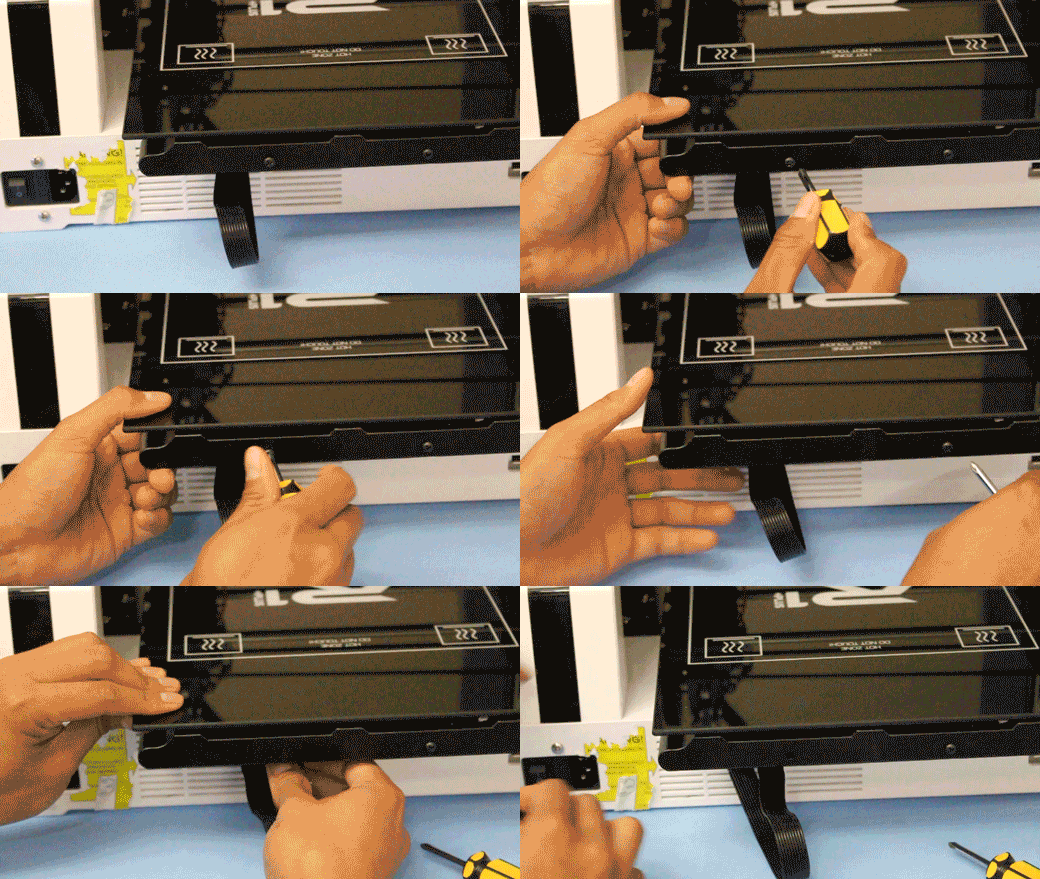
8. Carefully remove the print bed from the Y carriage by lifting it up from it's magnets and sliding out.
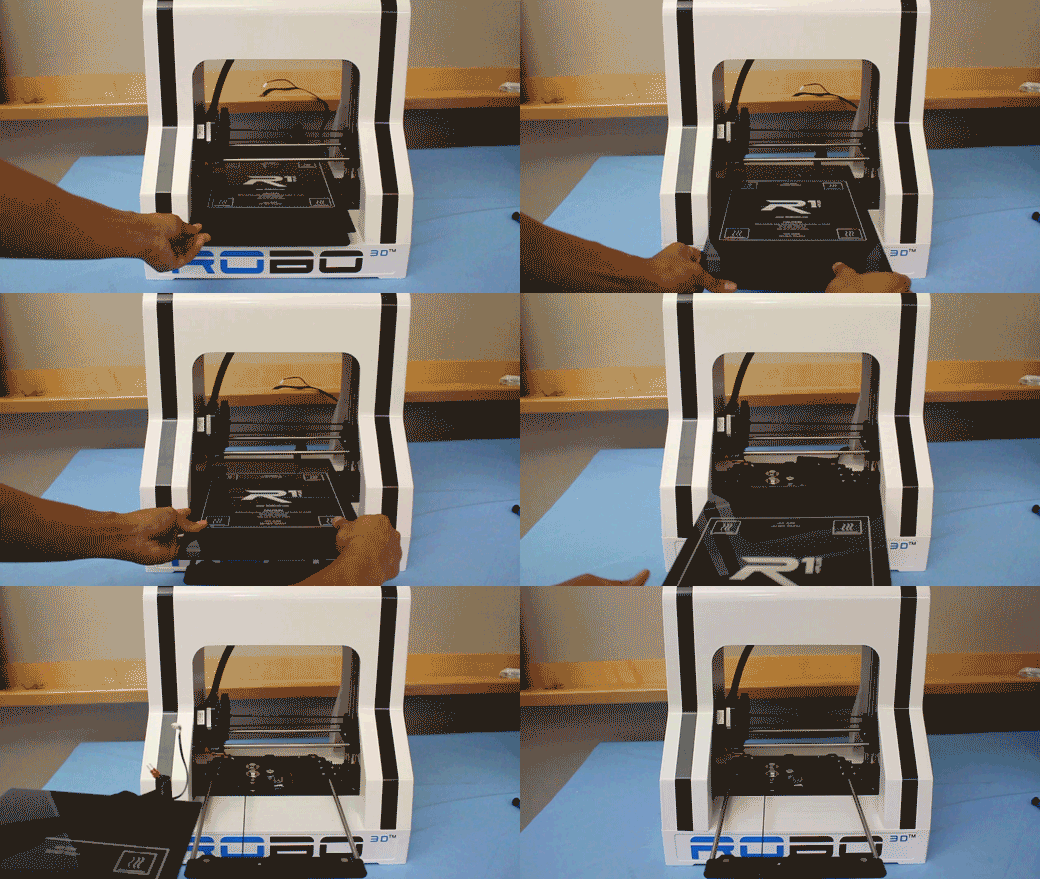
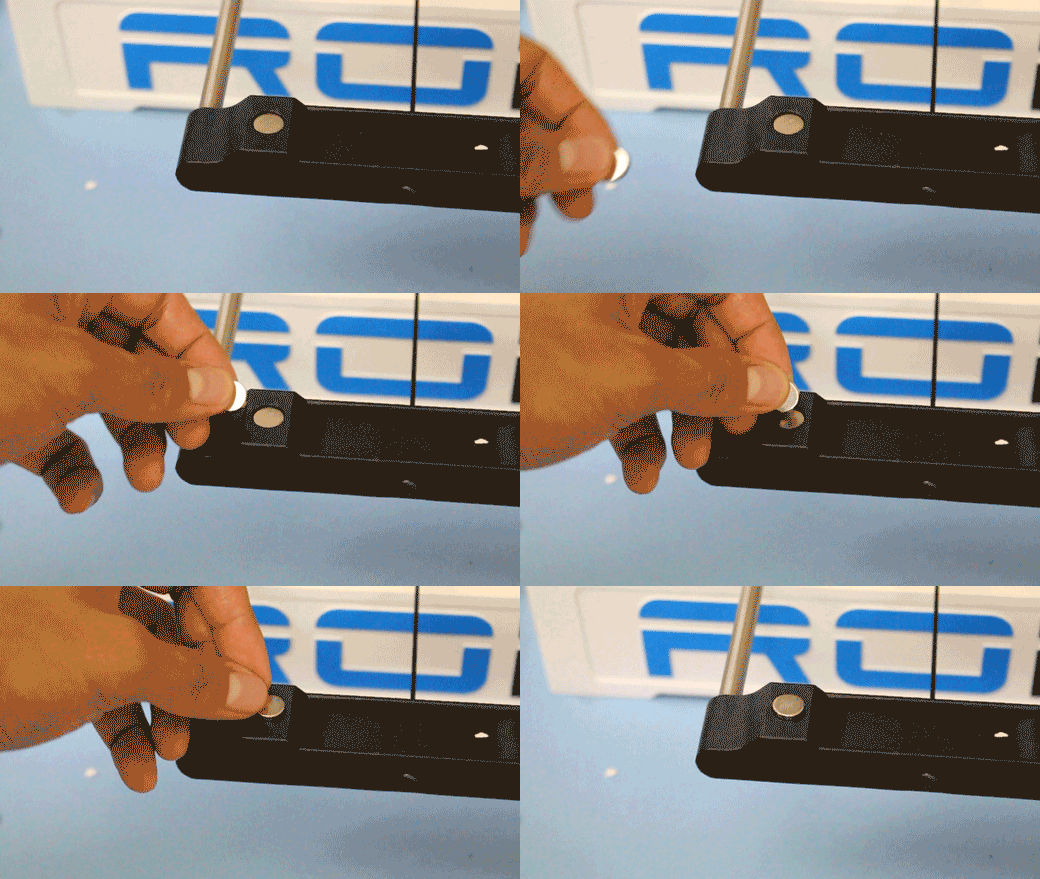
9. You will need to glue the four (4) magnets onto your replacement bed. The best way to keep them perfectly aligned and with the right polarization is to pre-place all four magnets onto the existing magnets on the Y axis brackets.
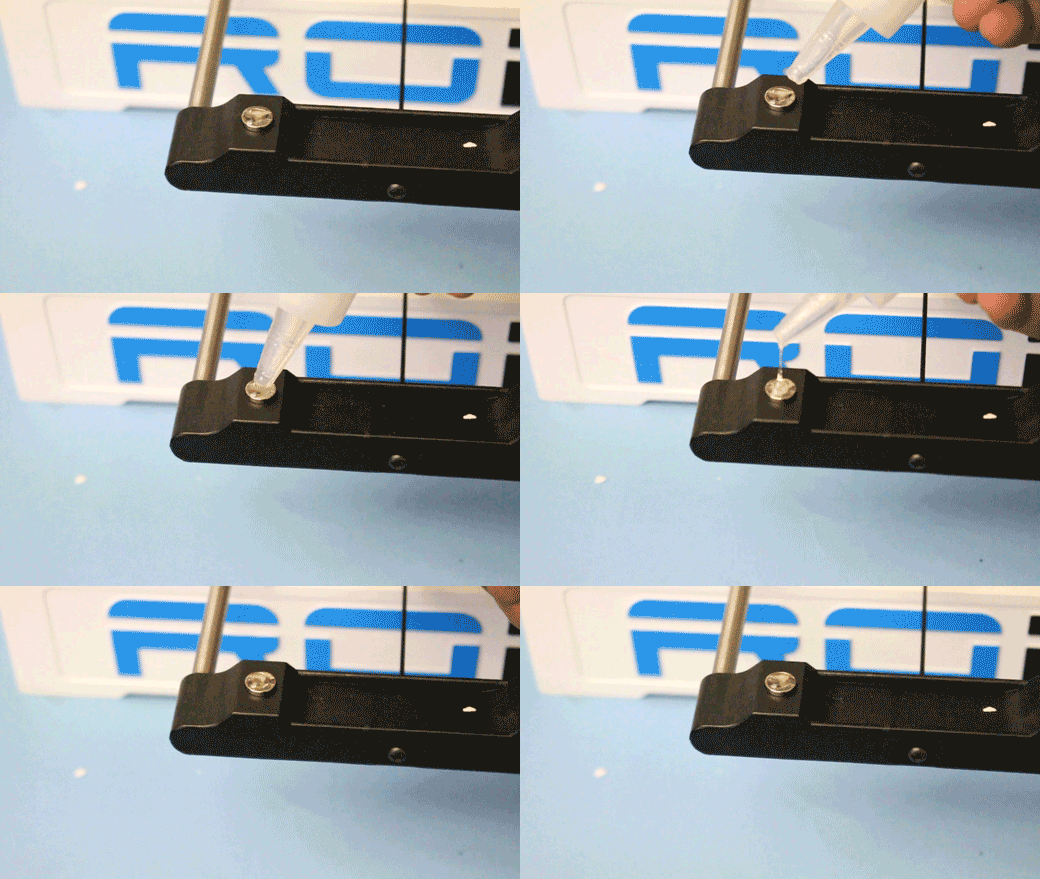
10. Next, apply glue to the top of all four magnets. Do not overdue it, as it will spill off the sides and glue the magnet down to the plastic bracket.
NOTE: We recommend using EPOXY or a high heat glue to place the magnets onto, as regular glue or superglue will likely melt when the bed is heated.
11. Carefully place your new heatbed inside your unit and be sure to tuck in your cable and feed it through and underneath the axis as you do so. Take your time with this. Make sure both ends of the bed are parallel with the Y Axis Brackets, and try to keep it centered. Wait for the glue to dry before moving to the next step.
NOTE: Press down on all four corners of the Heatbed to ensure that the magnets maintain flat contact.
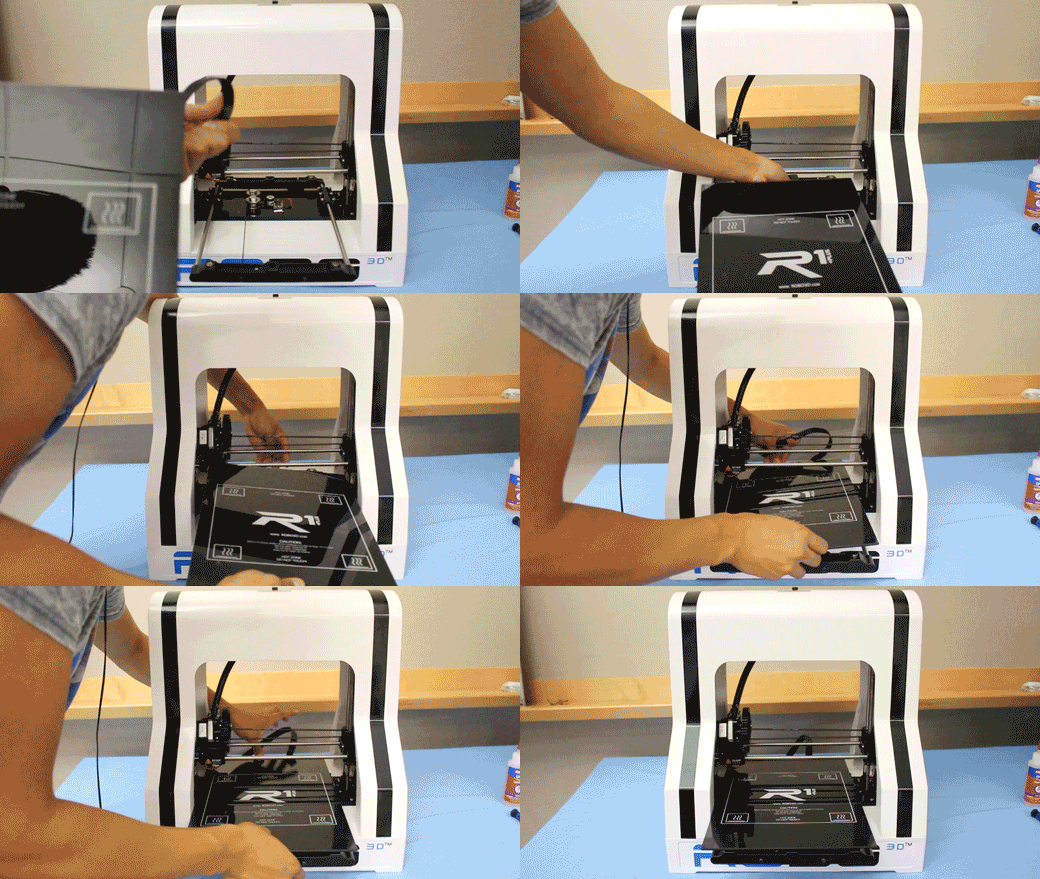
12. Clip in the bed connector to the loose wires and fish the loose wires through the slit in the rear of the printer.
Note: If your new replacement bed is V1, skip this step and move onto 13.

13. Flip the printer onto its front or side and make sure the loose wires are fed through the back slit. Now, screw the loose cables of the new bed into the old green terminal.

14. Next plug the green terminal and thermistor (white plug) into their respective terminals on the RAMPS Board.

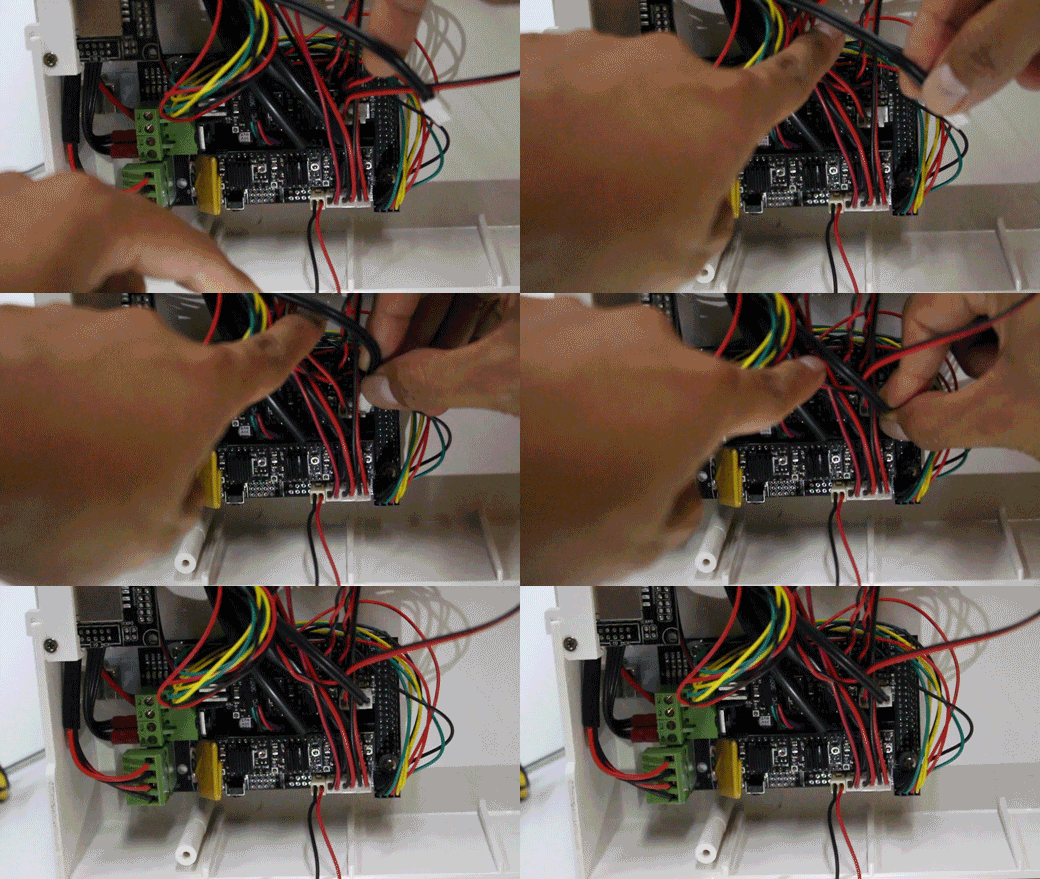
15. Now re-secure the bottom panel onto the unit and you're ready to get back to printing!

Comments
2 comments
Super Helpful! Thanks!
Mi plataforma caliente se rompió, donde podría comprar una ?
Podrían por favor dejar un link para hacer la compra gracias.
Soy nuevo en esto.
Please sign in to leave a comment.