Unboxing quick start video:
Table of Contents
Key Terms
About Robo E3 Pro
Inside the Box
Unpacking
Assembly and Set-Up
Loading Filament
Leveling
Printing
Build
WiFi & Cloud Printing
This quick start guide is designed for users to start their printing journey with your Robo E3 Pro. Even if you are familiar with earlier Robo 3D printers or 3D printing technology, we still recommend that you read this guide and the complete User Guide. Included you’ll find a lot of important information about your E3 Pro to help you have a better 3D experience.
Additional Resources:
User Guide
You will find the Quick Start Guide with the printer accessories. The User Guide contains everything you need to know about your printer including information on technical support, safety information, software, and interface details.
Official Robo Website: www.robo3d.com
The official Robo 3D website contains the up-to-date information concerning Robo 3D software, firmware, device maintenance, and so on.
Key Terms
|
Build Plate |
The surface on which the Robo E3 Pro builds an object. |
|
Build Tape |
The black tape that covers Robo E3 Pro’s build plate so that the object can stick to the build plate well. |
|
Build Volume |
The amount of space that an object will take up when completed. The Robo E3 has a build volume capacity of 280 x 250 x 300mm |
|
Extruder |
The extruder draws the filament from the spool, melts it, and pushes it through a nozzle onto the build plate. |
|
Nozzle |
Also called the ”print head,” this is located at the bottom of the extruder where heated filament is pushed out. |
|
Cooling Fan |
This cools the outer assembly of the extruder and gear motor. |
|
Filament Cartridge |
A specific location for placing Robo filament, this small rectangular hole is located on the back side of the printer. |
|
Filament Guide Tube |
A plastic tube that guides the filament from the filament cartridge to the filament intake. |
|
Filament Intake |
An opening located at the top of the extruder. |
|
Unclogging Pin Tool |
A tool that is used for cleaning and unclogging the extruder. |
|
Stamping Wrench |
A tool that is used for grasping the nozzle’s metal cube. |
About Robo E3 Pro
|
1 |
Touch Screen |
8 |
Extruder |
15 |
USB Stick Input |
|
2 |
Touch Screen Button |
9 |
X-Axis Guide Rod |
16 |
Filament Detector |
|
3 |
Nozzle |
10 |
Filament Intake |
17.. |
Power Switch |
|
4 |
Z-Axis Guide Rod |
11 |
Spring Presser |
18 |
Power Input |
|
5 |
Build Plate |
12 |
Camera |
19 |
Filament Cartridge |
|
6 |
Leveling Knob |
13 |
Ethernet Input |
|
|
|
7 |
Filter Fan |
14 |
USB Cable Input |
|
|


Front | Top


Right | Back
Inside the Box
Besides your new Robo E3 Pro, you will find the following in the box:
|
A |
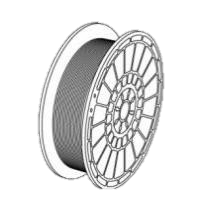
Filament |
B |
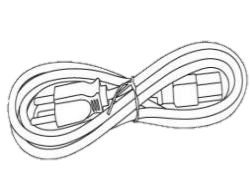
Power Cable |
C |
Quick Start Guide |
|
D |
Spool Holder |
E |
USB Cable |
F |
Filament Guide Tube |
|
G |
Screwdriver |
H |
Unclogging Pin Tool |
I |
Allen Wrenches |
|
J |
Stamping Wrench |
K |
Grease |
L |
Glue Stick |
|
A |
 |
B |
 |
C |
 |
|
D |
 |
E |
 |
F |
 |
|
G |
 |
H |
 |
I |
 |
|
J |
 |
K |
 |
L |
 |
Unpacking
 |
 |
|
|
1. With the box on the floor, open it. Make sure you have two people! The printer is heavy.
|
|
2. Remove the two foam pieces and unwrap the top of the bubble wrap. |
 |
 |
|
|
3. Lift your E3 Pro out of the box and onto a table. You may choose to pull it sideways out of the box before lifting. Make sure you have two people to lift the printer. NOTE: PRINTER IS HEAVY! |
|
4. In the bottom of the box, remove the following: spool of filament, spool holder, USB cable, filament guide tube, glue stick, tool bag. Remove the foam from the top of the printer & retrieve the power cable from inside it.
|
 |
 |
|
|
5. Remove the three buckles circled above. |
|
6. Remove the protective plastic. |
|
|
|
|
|
7. Slide the extruder to the back of the machine so you can remove the clear printer top. To do so, rotate it sideways and lift through the opening on the top |
|
8. Insert the power cord into the Power Input (18) and plug the power cord into an electrical outlet. Power on the printer (17). |
|
|
|
|
|
9. On the printer screen, go into Tools/Manual and click on the Z- button to move the print bed upwards. (See the Interface Menus Introduction in the User Guide for more information.) |
|
10. Remove the two foam pieces below the print bed and unwrap the print bed. |
Assembly and Set-Up
Loading Filament


The Tools screen provides a series of menus which allow you to control a lot of features of your machine including leveling, changing filament, and connecting to the internet. We’ll start with loading filament.
The Filament screen allows you to Load and Unload filament. Before changing or loading filament, always make sure the build plate is not touching the nozzle. You want at least 50mm of space.
|
|
 |
|
|
1. Click "Load" While it heats up, prepare the filament |
2. Insert the spool holder (D) into the filament Cartridge (19) on the back of the machine |
 |
 |
|
|
3. Unpackage the spool of filament. Slide it onto the spool holder so the filament is going counter-clockwise. |
4. Feed the filament through the Filament Detector (16) and then through the filament guide tube. Push it far enough that it exits the other end of the tube. |
|
|
 |
|
|
5. After the Extruder’s (8) temperature reaches220°C, the printer will sound a beep to prompt you to load the filament into the extruder. |
6. Insert the filament from the filament guide tube into the Filament Intake (10) at an upright angle. Apply pressure until the Extruder starts pulling the filament. |
|
|
 |
|
|
7. Wait until it has been extruding from the Nozzle (3) for a few seconds before clicking ”Done” on the screen. |
This is what it should look like when the filament is starting to extrude from the nozzle
|
|
|
 |
|
|
8. Place the clear top onto the printer as shown above. |
9. Make sure filament guide tube is going through the opening at the back. |
Congratulations, you have now loaded your filament and finished assembling your printer!
Leveling


The Level button walks you through leveling your printer. First it will set the printer to it’s Home position. Then it will test the level of the print bed at three locations, directing you on how to adjust the nuts until it is properly leveled. Follow the on-screen instructions until you complete leveling.


Congratulations, you have leveled your printer! You are now ready to start printing!
Printing
Build


From the Build screen you can either select from files saved directly to the printer, from a USB Drive, or from your Cloud account. The arrow button in the bottom right always returns you to the previous screen. When you select either local, USB, or cloud, it will give you a list of available files. Click on a file to Build, Copy, or Delete it.
WiFi & Cloud Printing
|
|
 |
|
|
The Settings menu allows you to set up your internet connection, your cloud accounts, and more settings to get your printer ready to go. |
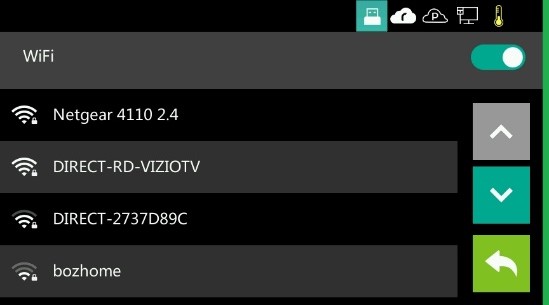
Use the arrows on the side to scroll. Click on WiFi to connect to your local network. You can also use an ethernet cable. |
|
|
 |
|
|
Within ”WiFi”: Select from a list of available networks and then insert the network password to connect to the internet. |
On the second Settings screen, you can connect to your preferred cloud systems including Polar Cloud, robo Cloud, and 3DprinterOS/MyStemKits |


The About screen shows you information about your printer including the Tokens or Codes used to connect to various cloud printing platforms including MyStemKits (3DprinterOS), RoboCloud, and Polar Cloud.


Comments
0 comments
Please sign in to leave a comment.