
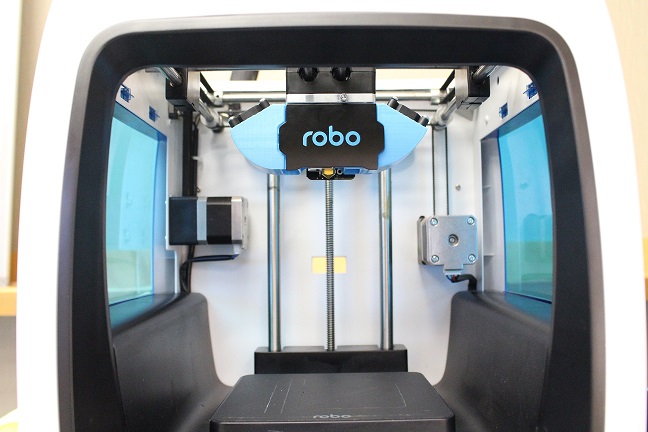
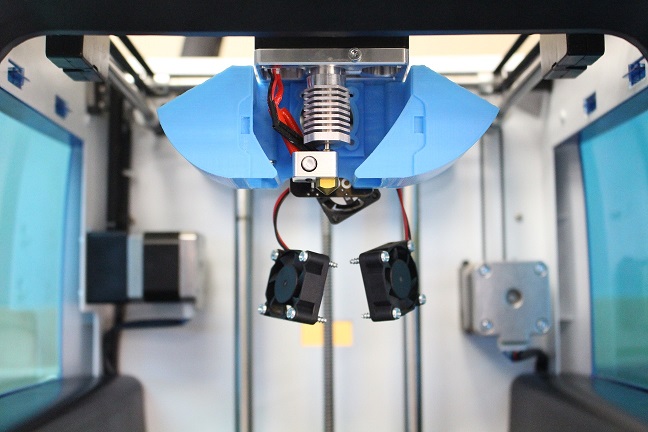
If you are wanting more air flow while printing with your Robo C2 or R2, follow this step-by-step guide to uninstall your stock fan duct, and install your shiny new 3D printed fan duct with no extra hardware. This 3D printed fan duct should provide even better airflow to your prints and make print cooling and bridging that much better. The finished product is shown below.
Download the model and print
**First, before uninstalling anything, make sure to download and print out the new fan duct. The STL file can be found here on Thingiverse. Make sure to use supports. On a Robo C2 bed, the object must be turned 45 degrees in order for it to fit on the build plate. After this is printed, proceed with the rest of the article.
NOTE: If you install this modification, you may end up with a thermal runaway error, meaning your hotend is being cooled too much. If this is happening, turn down your fan speed and also, disable them until 10-15mm above the print. These settings can be found in the article mentioned above.
Uninstalling your stock fan duct
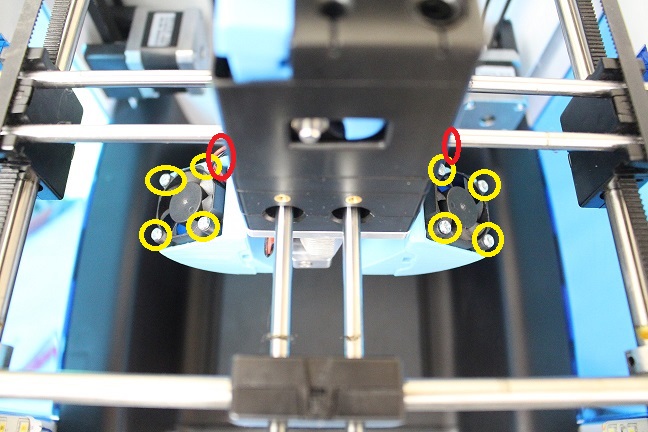
Step 1) Remove the metal extruder faceplate. Then, unscrew the two top-mounted cooling fans. Each fan has four screws.

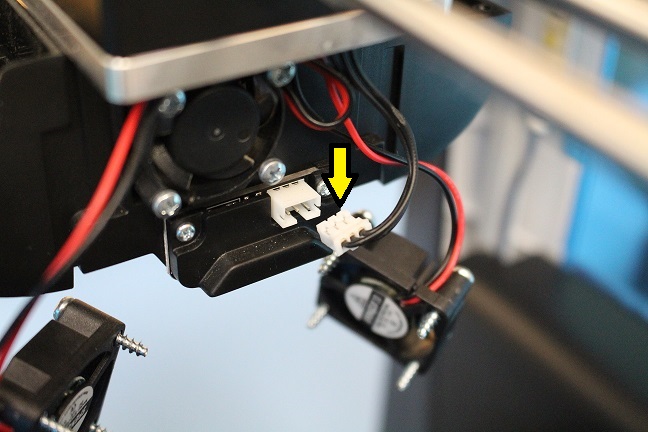
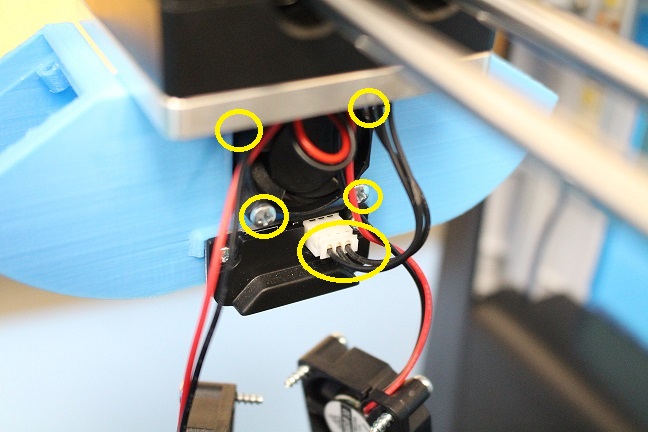
Step 2) Look at the backside of the extruder assembly and gently unplug the 3-wire plug that attaches to the IR leveling sensor.
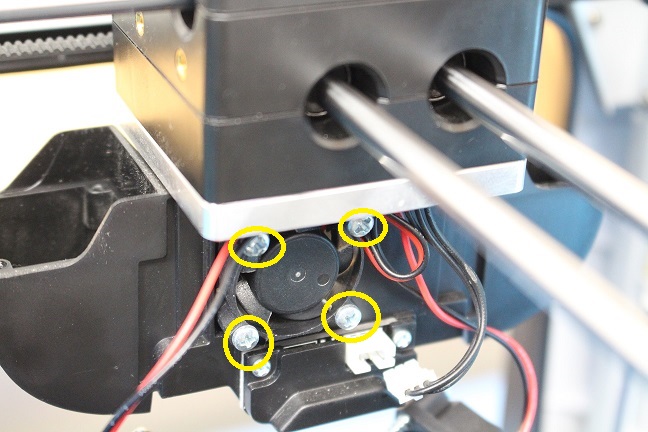
Step 3) Unscrew the hotend cooling fan. There are four screws total.
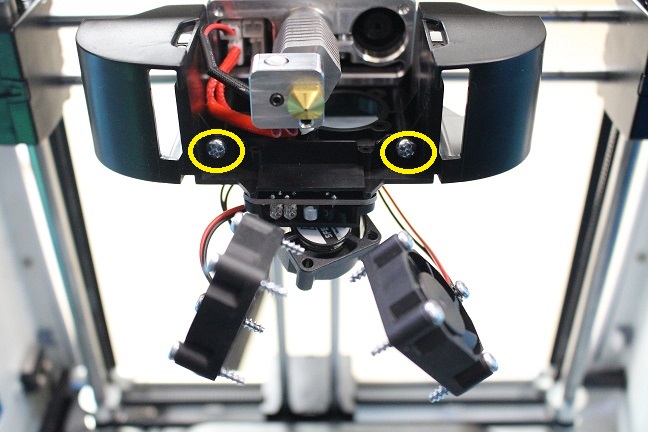
Step 4) With the fans and IR sensor unplugged, look underneath the extruder assembly and carefully undo the two screws holding which hold the duct into place as shown below. These screws are very important so do not lose them.
Once fully uninstalled, your extruder assembly should look like this:

Installing your new 3D printed fan duct
Now that you have uninstalled your stock fan duct, it's time to install the new 3D printed one.
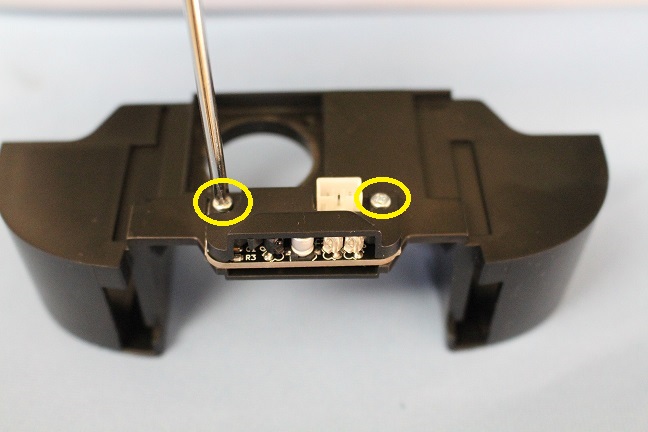
Step 1) Take your stock fan duct and unscrew the IR sensor cover and IR board from the back of it. Be careful that you do not separate these two pieces. Now take the IR cover and sensor over to your 3D printed piece.
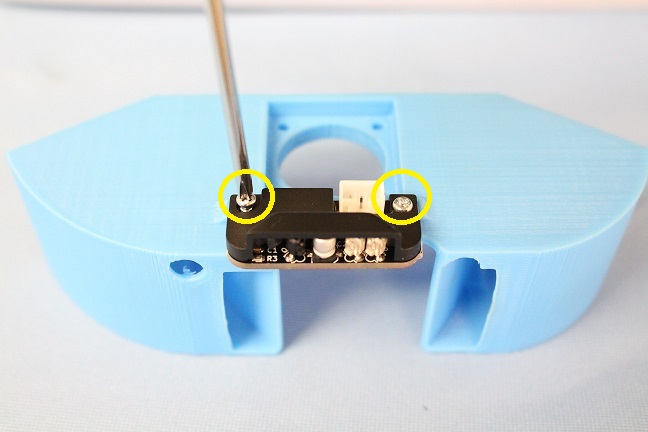
Step 2) Install the IR sensor and cover onto the 3D printed fan duct with the same two screws.
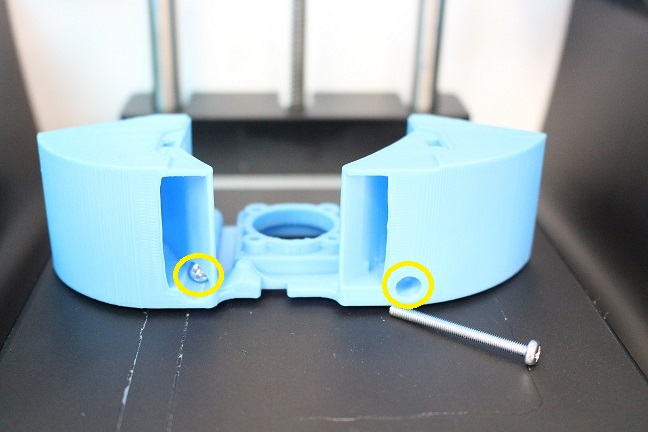
Step 3) Now, take the long screws from the uninstall, and put them into the new fan duct at the bottom. Then, screw the new fan duct into the extruder assembly grey metal plate. There are two unused tapped holes near the back 3rd of the metal plate (highlighted below). The result should look like the pictures below:

Step 4) Screw in the hotend cooling fan and plug in the 3-wire plug for the IR sensor.
Step 5) Now, screw in your cooling fans to the new duct. Tip: Make sure the wires are pointed toward the back of the assembly for a cleaner look and less stress on the wires.
Step 6) If you would like, remove the magnets that hold the metal extruder faceplate from the stock fan duct and use epoxy or a high heat glue to glue them into place on the front of the new 3D printed fan duct.
Note: Make sure to re-run the Z-offset wizard before you start printing, as the IR sensor might now be in a slightly different position from the stock position.
Congratulations! You have completed the modded fan duct install! You should have even better airflow for cooling your prints. Happy printing :)
Comments
0 comments
Please sign in to leave a comment.