
Overview
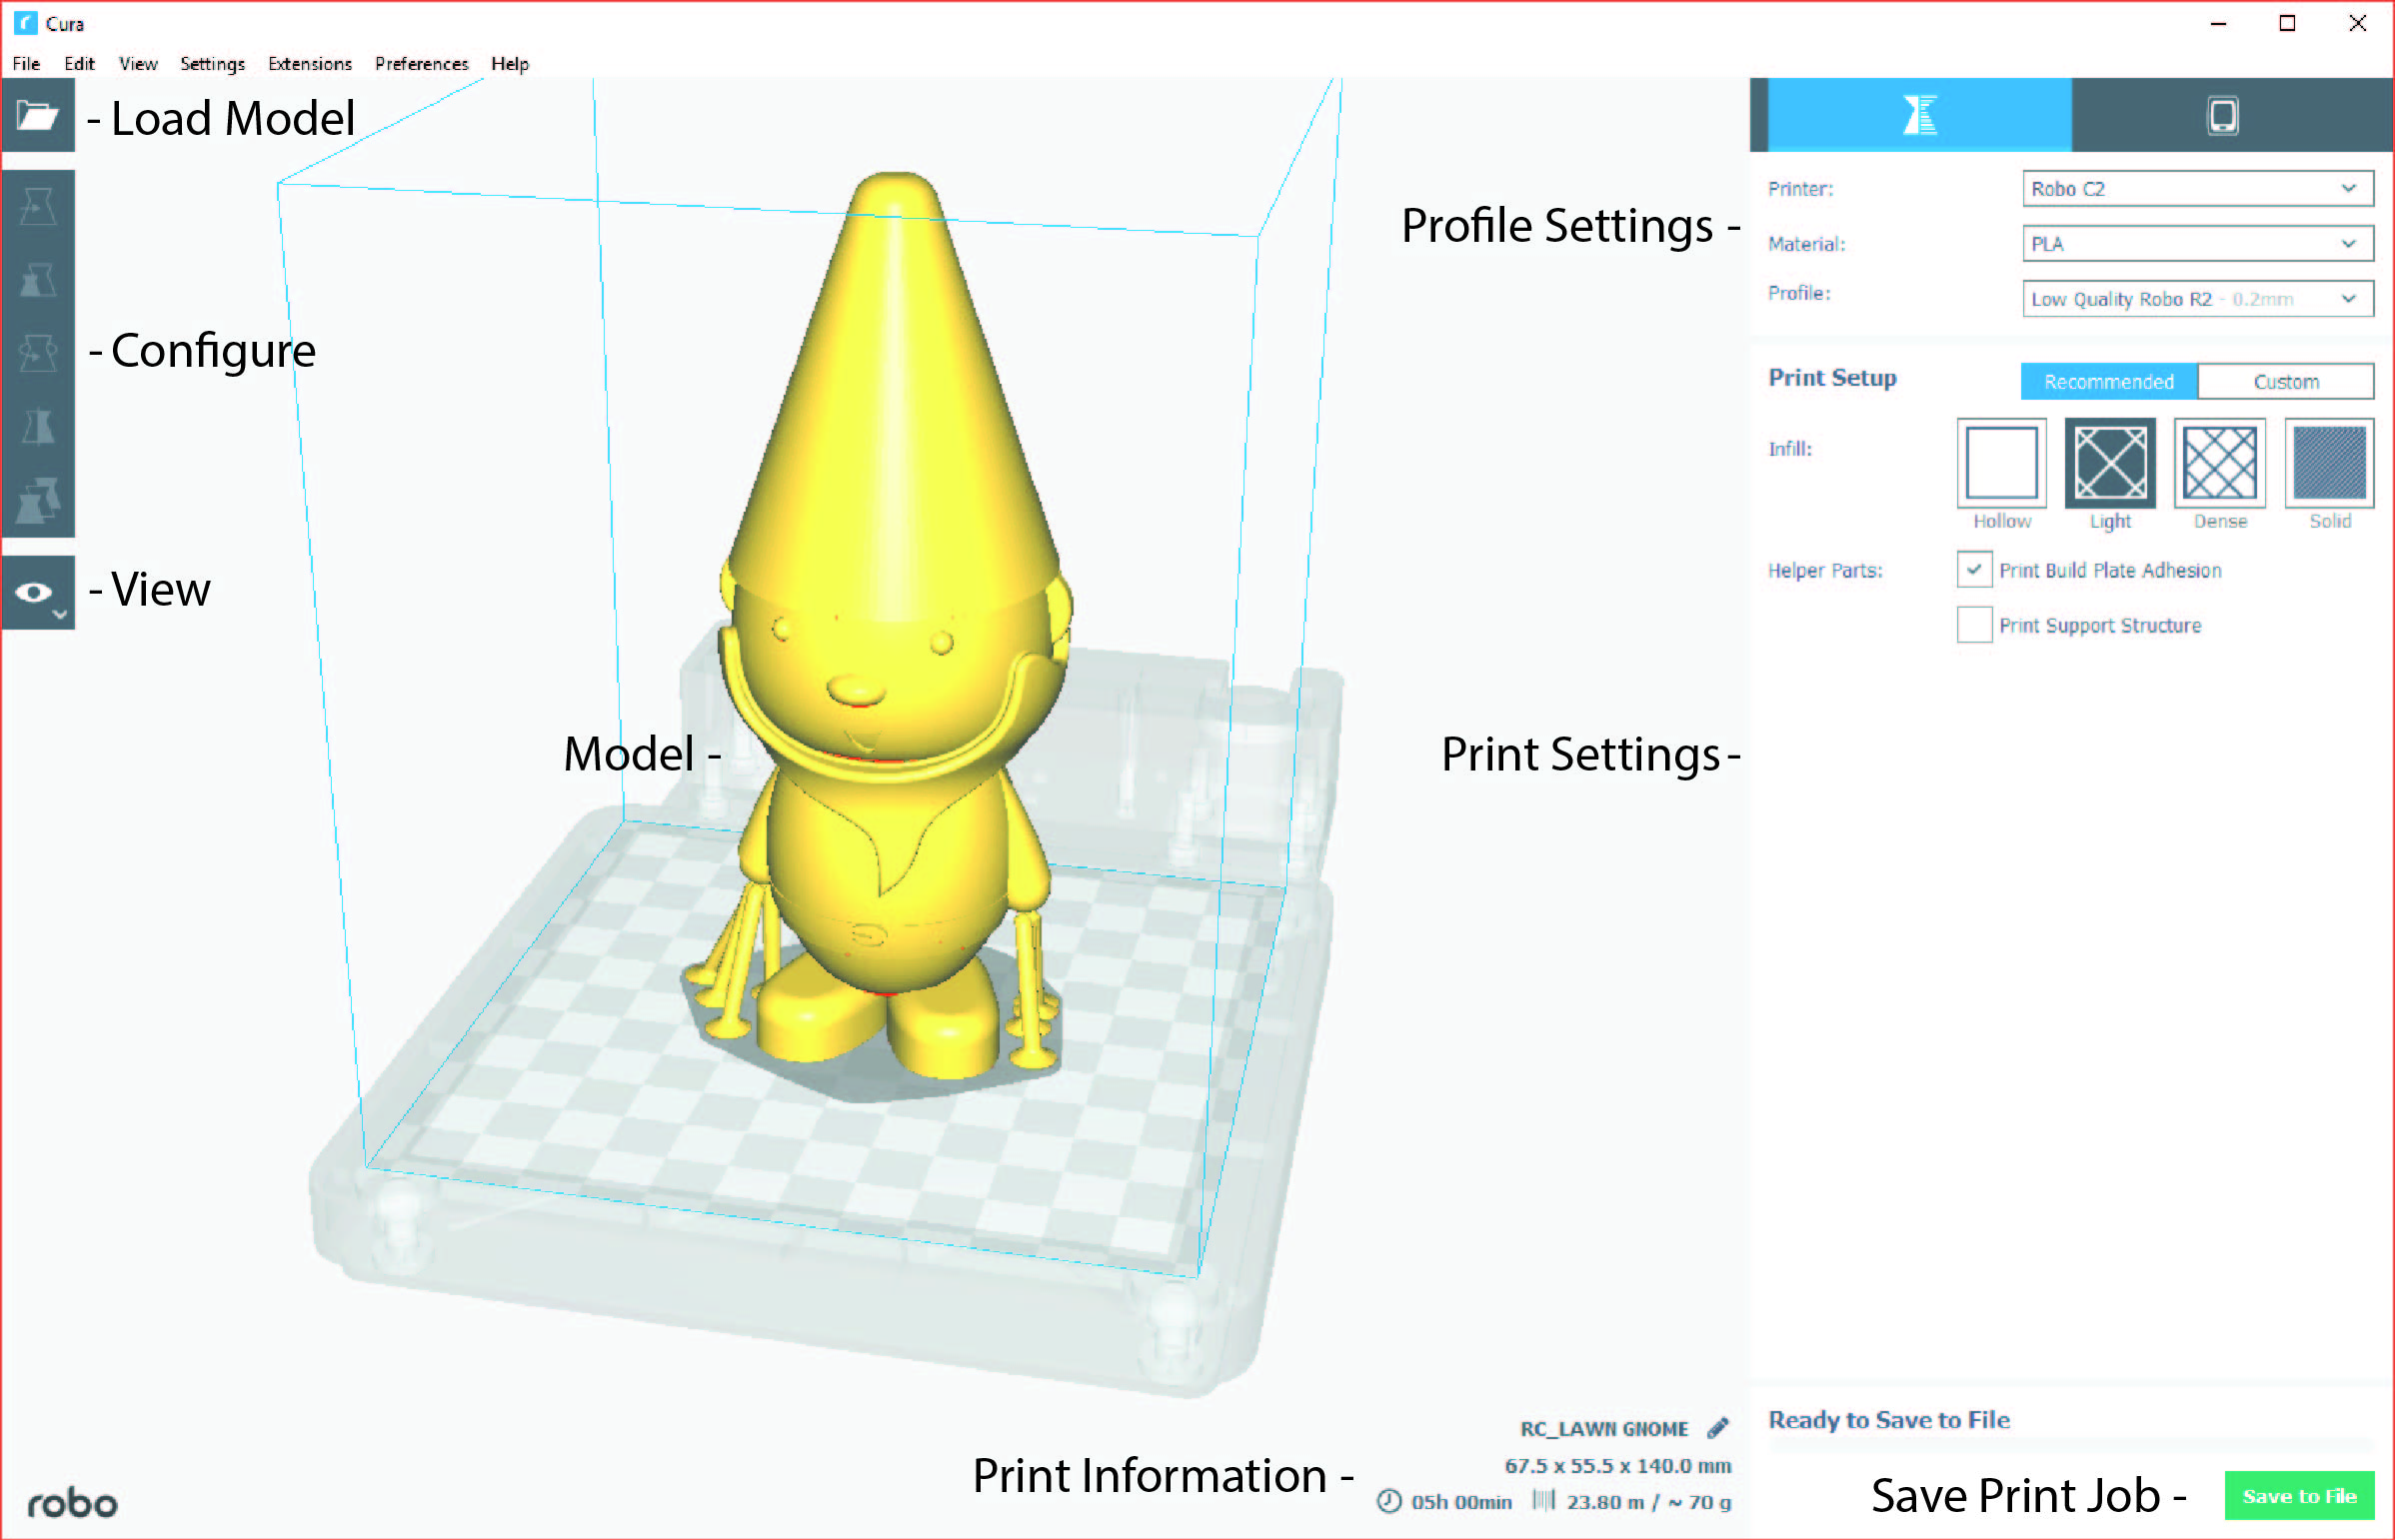
This is the main view of Cura for Robo. You can reference back to it if you ever need a quick refresh of where things are located within the software.
Loading a model
- Click on the ‘Open File’ icon at the top left of the screen. Find your .stl file you would like to load and click ‘open’. Once this is done, the model should appear on the build platform in the main viewer.
Selecting Material
- Once your model is loaded, the next option you will need to select is your material. Make sure the material you select is the same one that is loaded into your printer.
Selecting a Profile
- Next, click on the dropdown menu marked ‘Profile’.
- Here, you will see different profile settings that will determine the quality of your print.
- Select the profile desired - Low, Medium, High, Ultra High Quality.

- Below the Pofile settings, you will find the simple recommended print settings. Here you can change infill density, as well as using print build plate adhesion for better adherance on your first layer, and support structure for generating scaffolding to support overhangs and bridges.
Comments
0 comments
Please sign in to leave a comment.